A Shopify mix and match bundle builder is a page where shoppers pick their own mix of products, watch the discount update, and buy it all as one bundle. Shopify has no built-in builder, so you use an app: in NeatBundles, create a Build Your Own Bundle, choose products, set the discount and pick limits, then set it Active.
This post is about the builder itself: what a shopper actually sees while filling it, which setting is behind each part of that experience, and how people find the builder once it's live. I'm using the cookie builder from our demo store and the setup from the video above. If you want the general mix and match tutorial, it's in how to create mix and match bundles on Shopify. If you're still deciding what to offer, start with the mix and match bundle ideas, and if you're still choosing an app, read the mix and match apps comparison.
Key takeaways
- A bundle builder lets shoppers fill a bundle from your products on one page and shows the saving before they buy.
- Four panels in the editor shape it: Products, Pricing & Discounts, Rules and Visibility. A simple version takes a few minutes.
- Each cookie in the bundle stays its own item in Shopify orders, so stock stays accurate.
- Publishing isn't enough. Turn on the product page upsell card and add the builder to your menu so shoppers can find it.
What shoppers do inside a mix and match bundle builder
A mix and match bundle builder is a single page with your products in a grid and a "Your Bundle" panel beside it. Shoppers click Add on the products they want, the panel lists their picks with the running total, and one Buy now button sends the whole bundle to checkout. Here is the cookie builder from our demo store with three cookies picked:
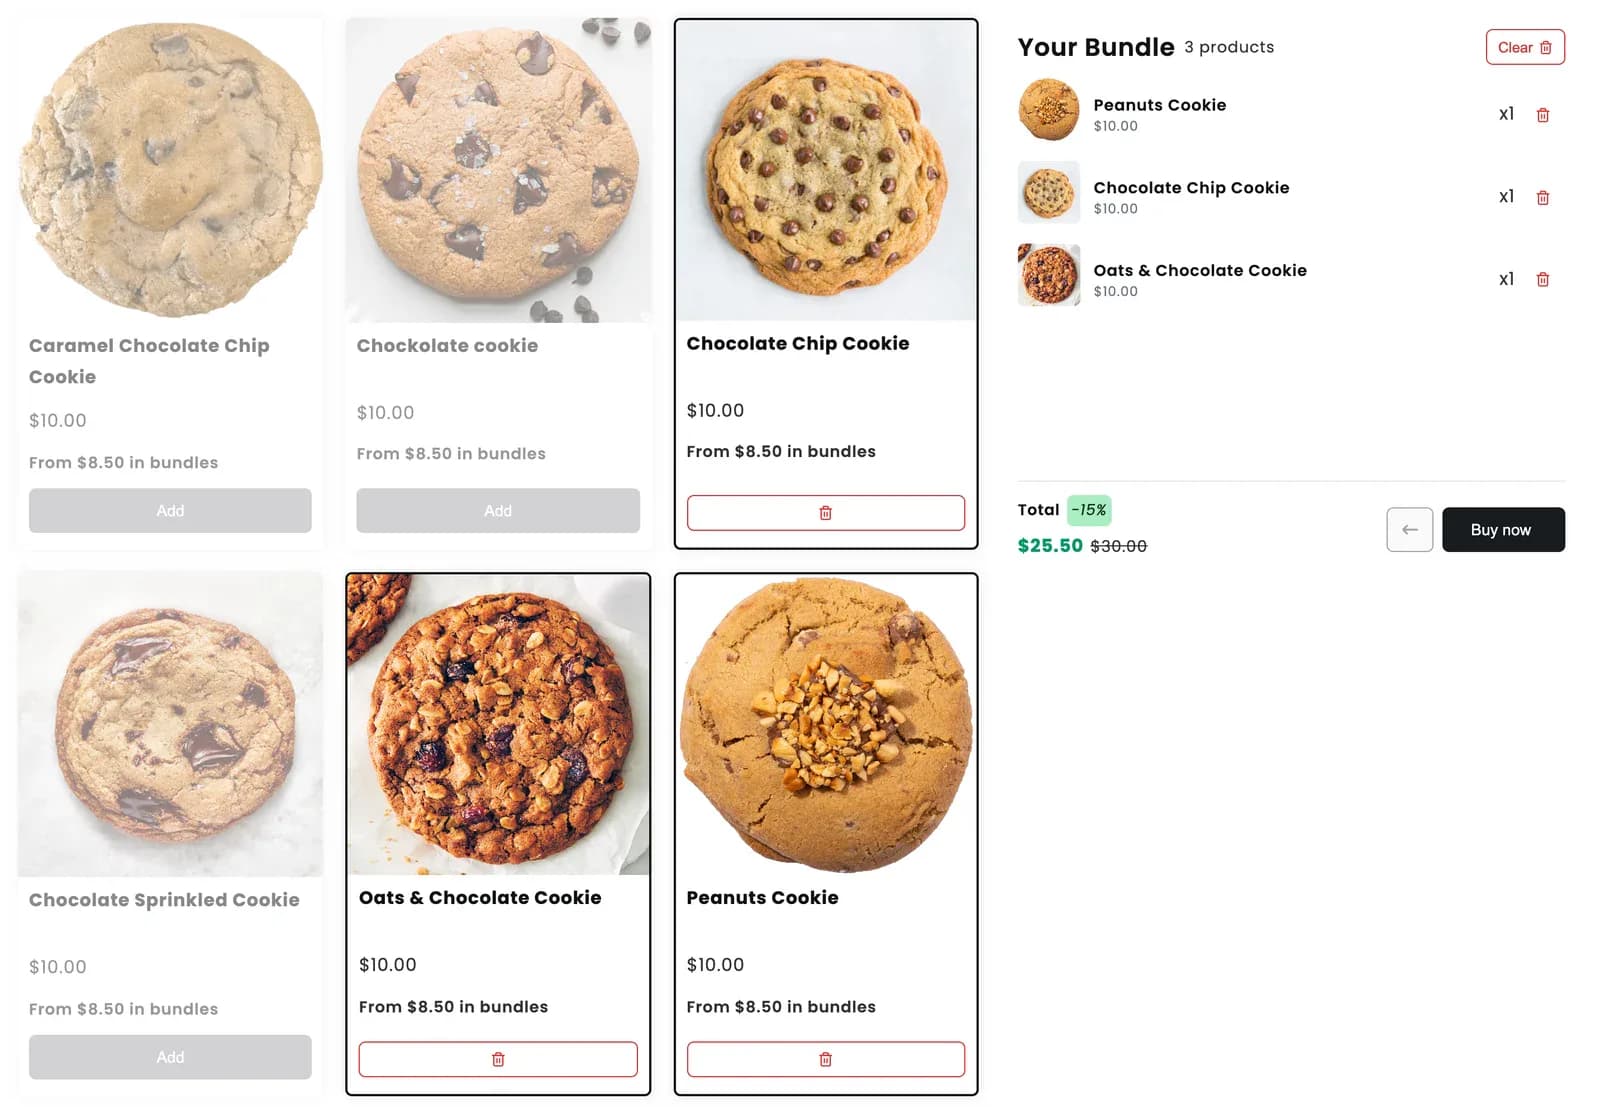
A few things in that screenshot do the selling for you:
- Every card shows the bundle price. Under the regular $10.00 there's "From $8.50 in bundles", so shoppers see the deal before they add anything.
- Picked items get a remove button. The selected cookies swap their Add button for a small bin icon, and the panel has one too, so changing your mind takes one click.
- The builder stops at the limit. This bundle allows up to three cookies. Once three are in, the other Add buttons grey out instead of letting the shopper add a fourth and fail at checkout.
- The saving sits next to the total. The panel shows $25.50 in green, the crossed-out $30.00 and a -15% badge.
The panel tells them what the next item is worth
The empty panel isn't blank. Before anything is added, it already says what the shopper has to do to get the discount: "Add 1 more product to get 15% off". The Buy now button stays disabled until the bundle meets your rules.
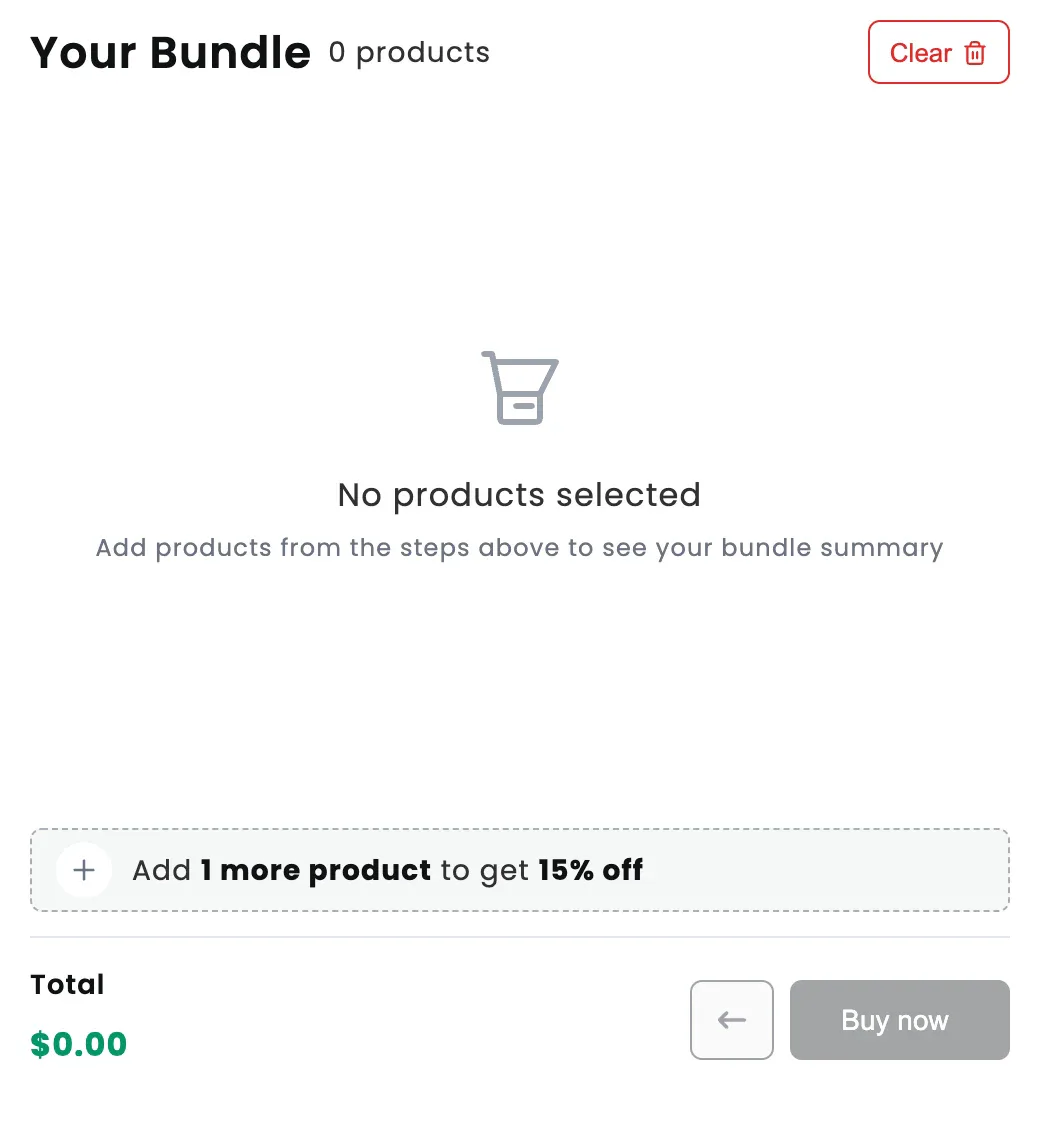
That one line answers the question every shopper has on a bundle page: what do I get for adding more? With volume tiers, the same line points shoppers to the next tier.
Checkout shows one bundle, your orders show every item
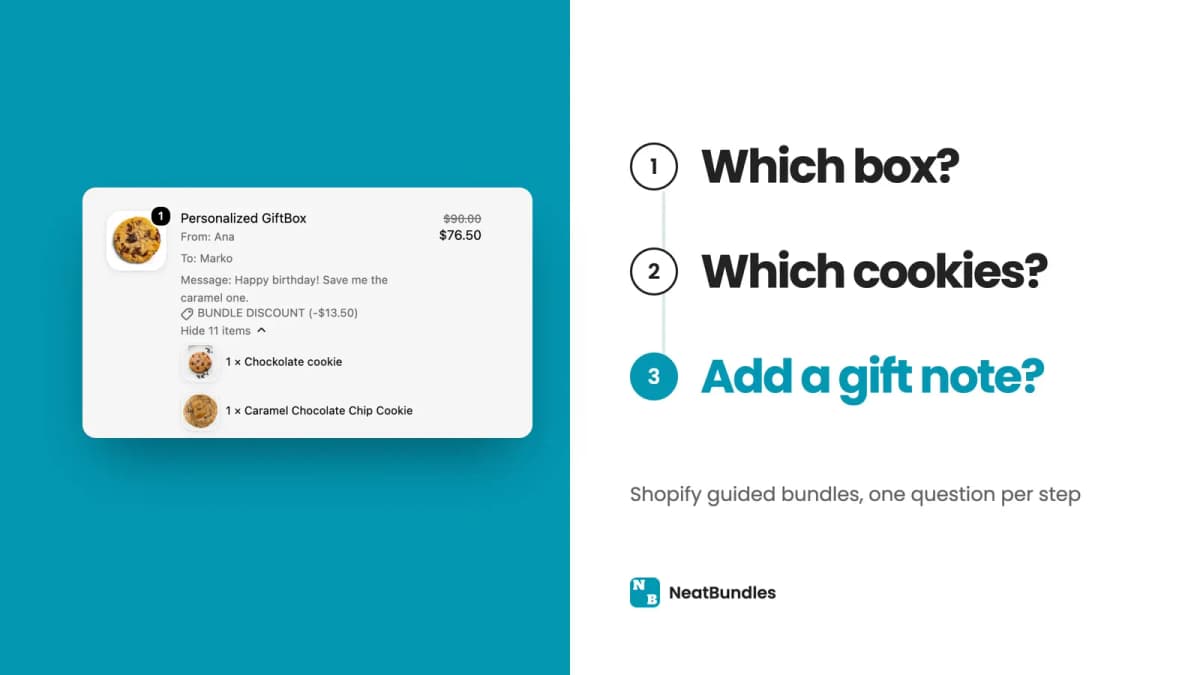
Buy now skips the cart and goes straight to checkout (you can send it to the cart instead). The three cookies arrive as one bundle line with the discount named on it, and the shopper can expand it to see each cookie:
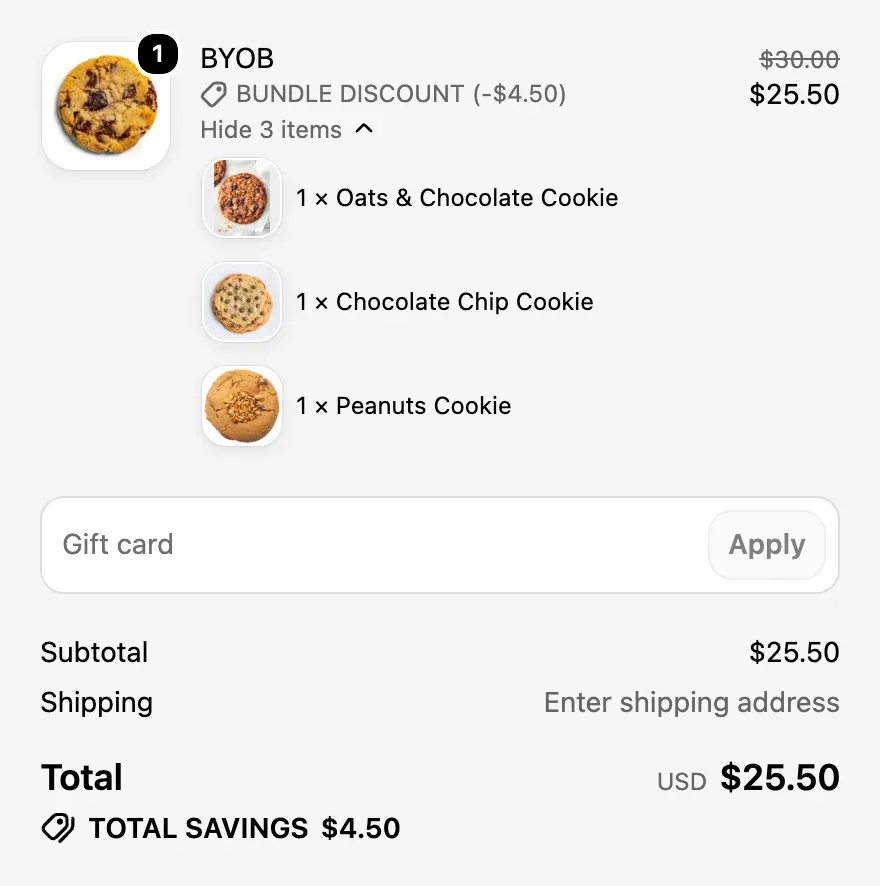
Behind the scenes, NeatBundles uses Shopify's native bundles, so the bundle breaks down into the individual products the shopper picked. In the video I put it this way: "That allows us to have proper inventory tracking and no overselling ever." The order shows up in your Shopify admin like any other order, with the three cookies listed as part of the bundle, ready to pack.
Setting up the builder in four panels
The editor that produces all of this has four panels you need to touch: Products, Pricing & Discounts, Rules and Visibility. I'm assuming NeatBundles is already installed and you've finished the short onboarding (the general tutorial linked above covers that part).
1. Start a Build Your Own Bundle
On the Bundles page, click Create bundle. NeatBundles asks for the bundle type first, and there are two:
- Build Your Own Bundle: shoppers mix and match products from one page. This is the builder in this post.
- Guided Bundle: shoppers build the bundle step by step, with optional personalization steps. Better when the bundle has parts that must be chosen in order, like box, then gifts, then a note. See guided bundles for that.
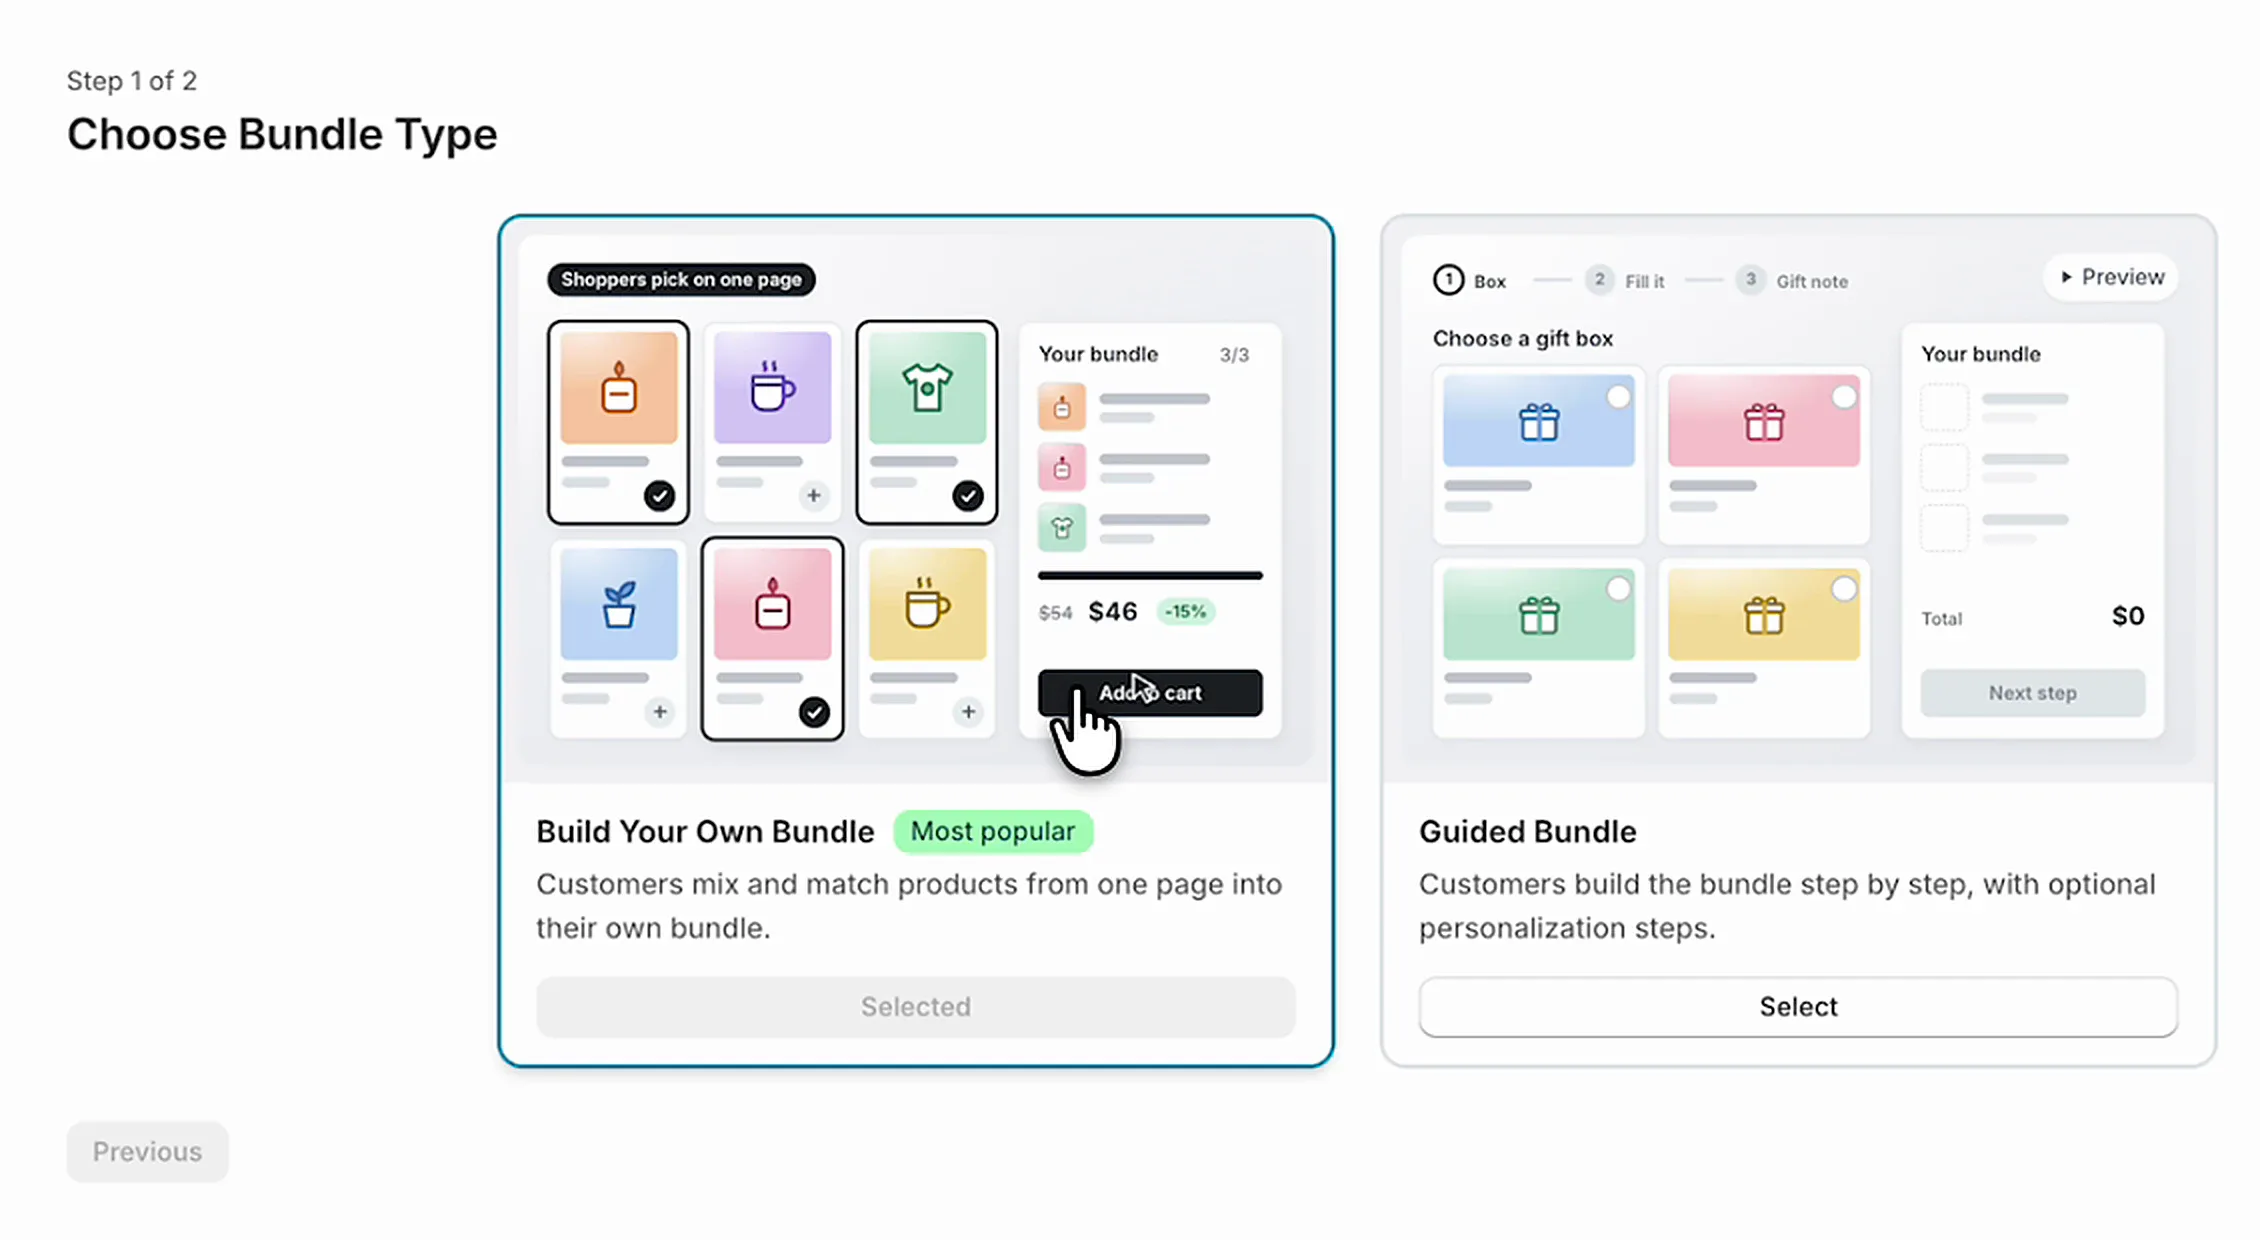
Select Build Your Own Bundle, click Next, type a title and click Finish. The screen suggests a few names. I used "Build Your Own Bundle", but pick something that describes the offer, like "Cookie Box", because shoppers will see it.
2. Products: hand-pick items or use a collection
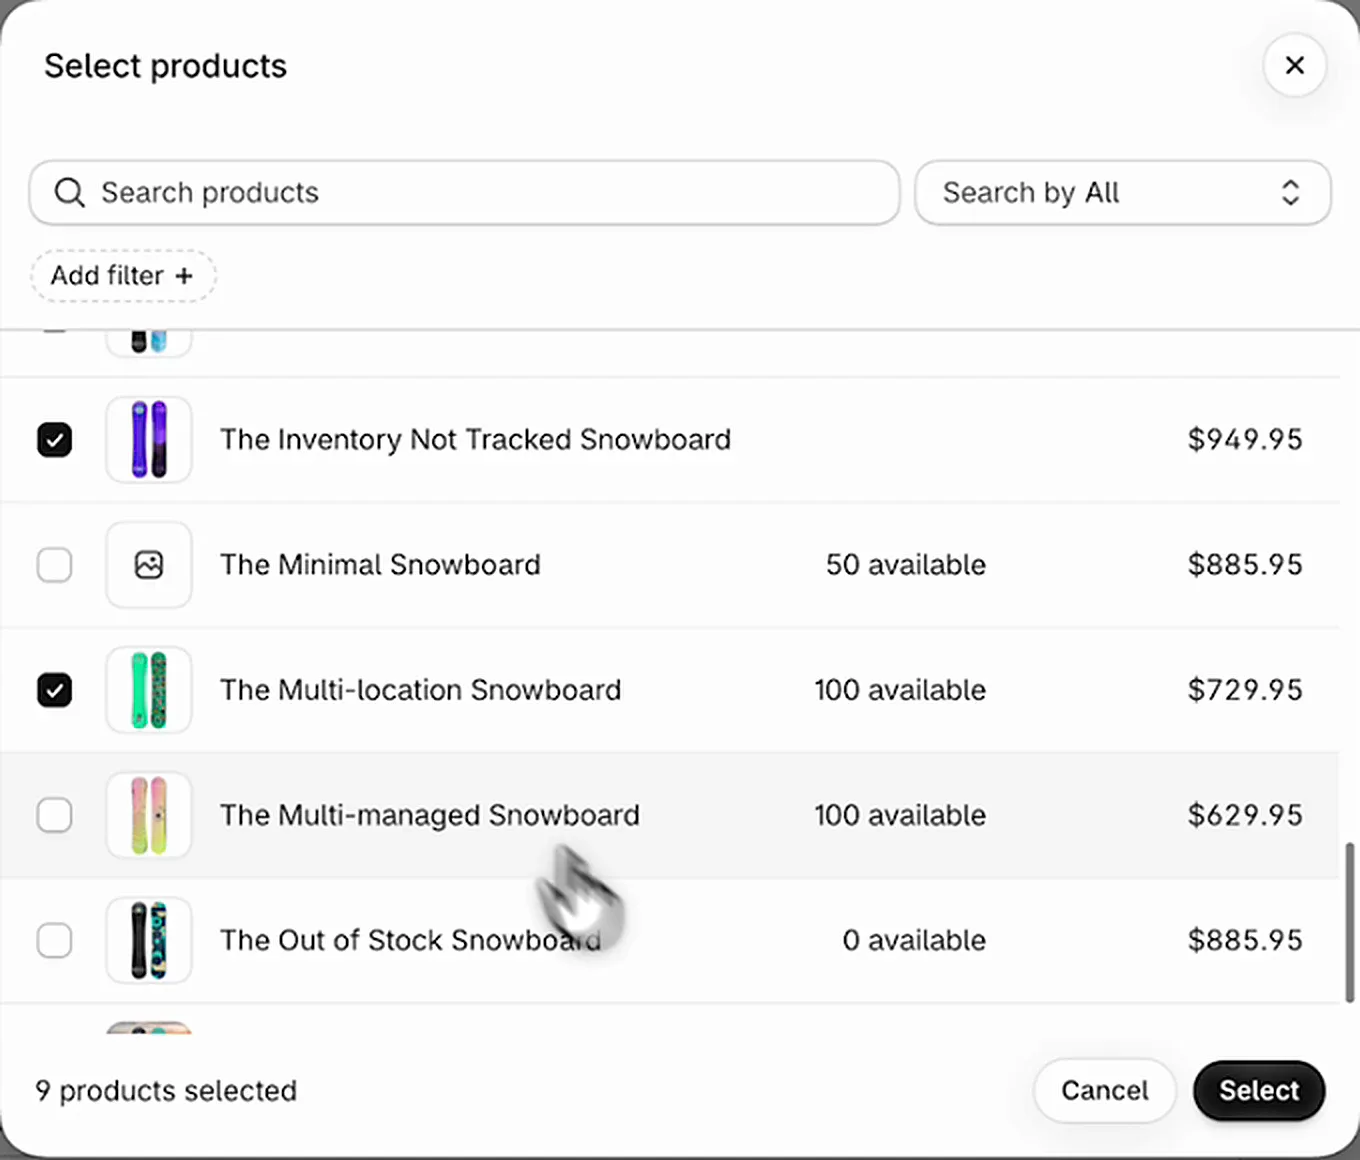
The Products panel decides what appears in the builder's grid. Click Select products, tick the items you want to offer, then click Select and Save.
If the products already live in a collection, switch the panel to Collections and pick that collection instead. Every product in it shows up in the builder, and you don't have to come back here each time you add a new flavour to the collection.
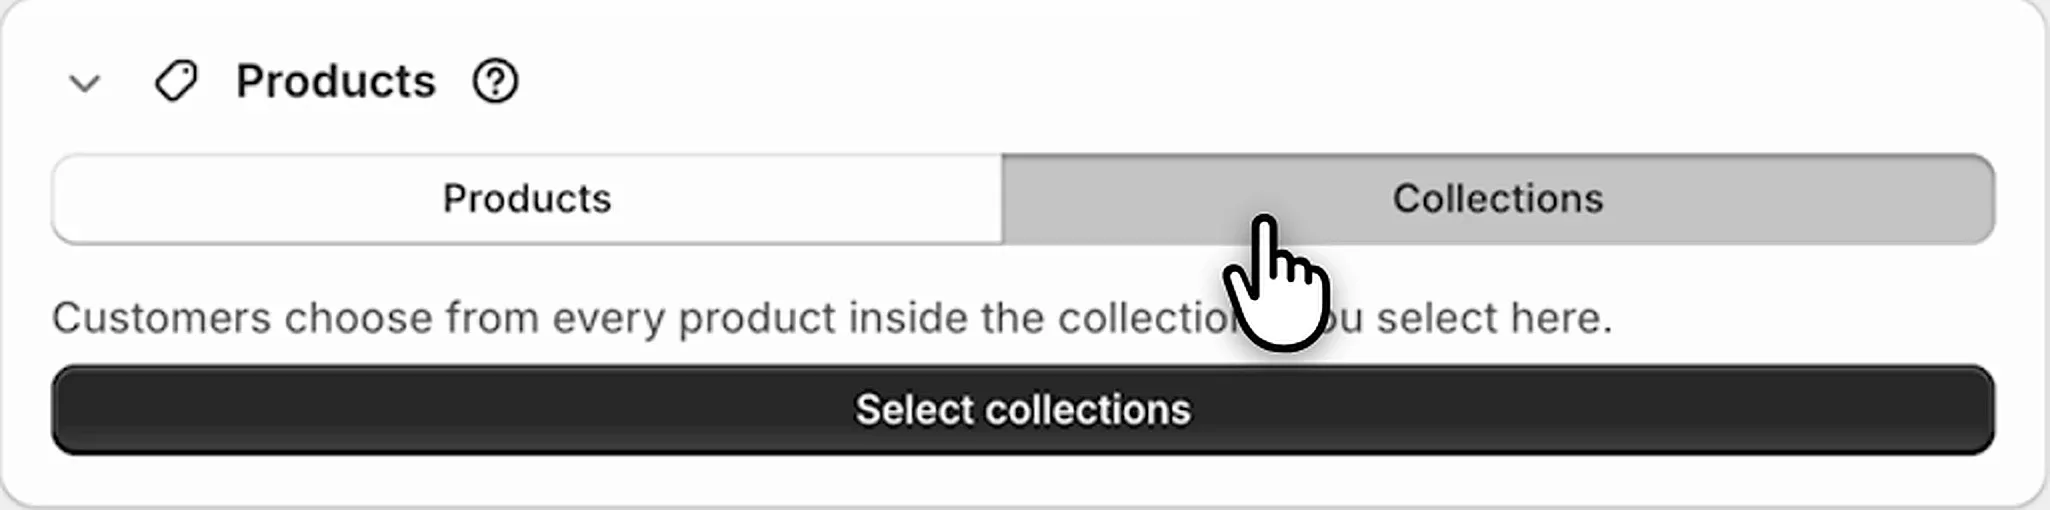
Tip: Use a collection for any range that changes often. Hand-picked products are better when you only want a few best sellers in the bundle, not the whole category.
3. Pricing and discounts: decide what the panel promises
Pricing & Discounts controls the numbers shoppers see on the cards and in the panel. The first choice is between Dynamic pricing, where the bundle costs what the picked products cost, and Fixed price, where every bundle costs the same no matter what's inside. With dynamic pricing you then choose the offer:
| Offer | What shoppers get | Good for |
|---|---|---|
| Discount, flat | The same % or amount off every bundle, e.g. 10% off | A first launch, simple promises |
| Discount, volume | A bigger discount at each tier, e.g. 10% at 3+ products, 15% at 5+ | Pushing shoppers to add one more |
| Bundle price | A set price for the bundle, e.g. any box for $25 | Easy-to-say offers |
| Price per item | Each pick costs the same, e.g. $8 a cookie inside the bundle | Ranges with similar prices |
| No discount | Regular prices, the builder is only for convenience | Gift sets, curated boxes |
Volume tiers can count products picked or bundle value, so "spend $50, save 10%" works as well as "pick 5, save 15%". In the video I also show tiers at 3+ and 5+ products:
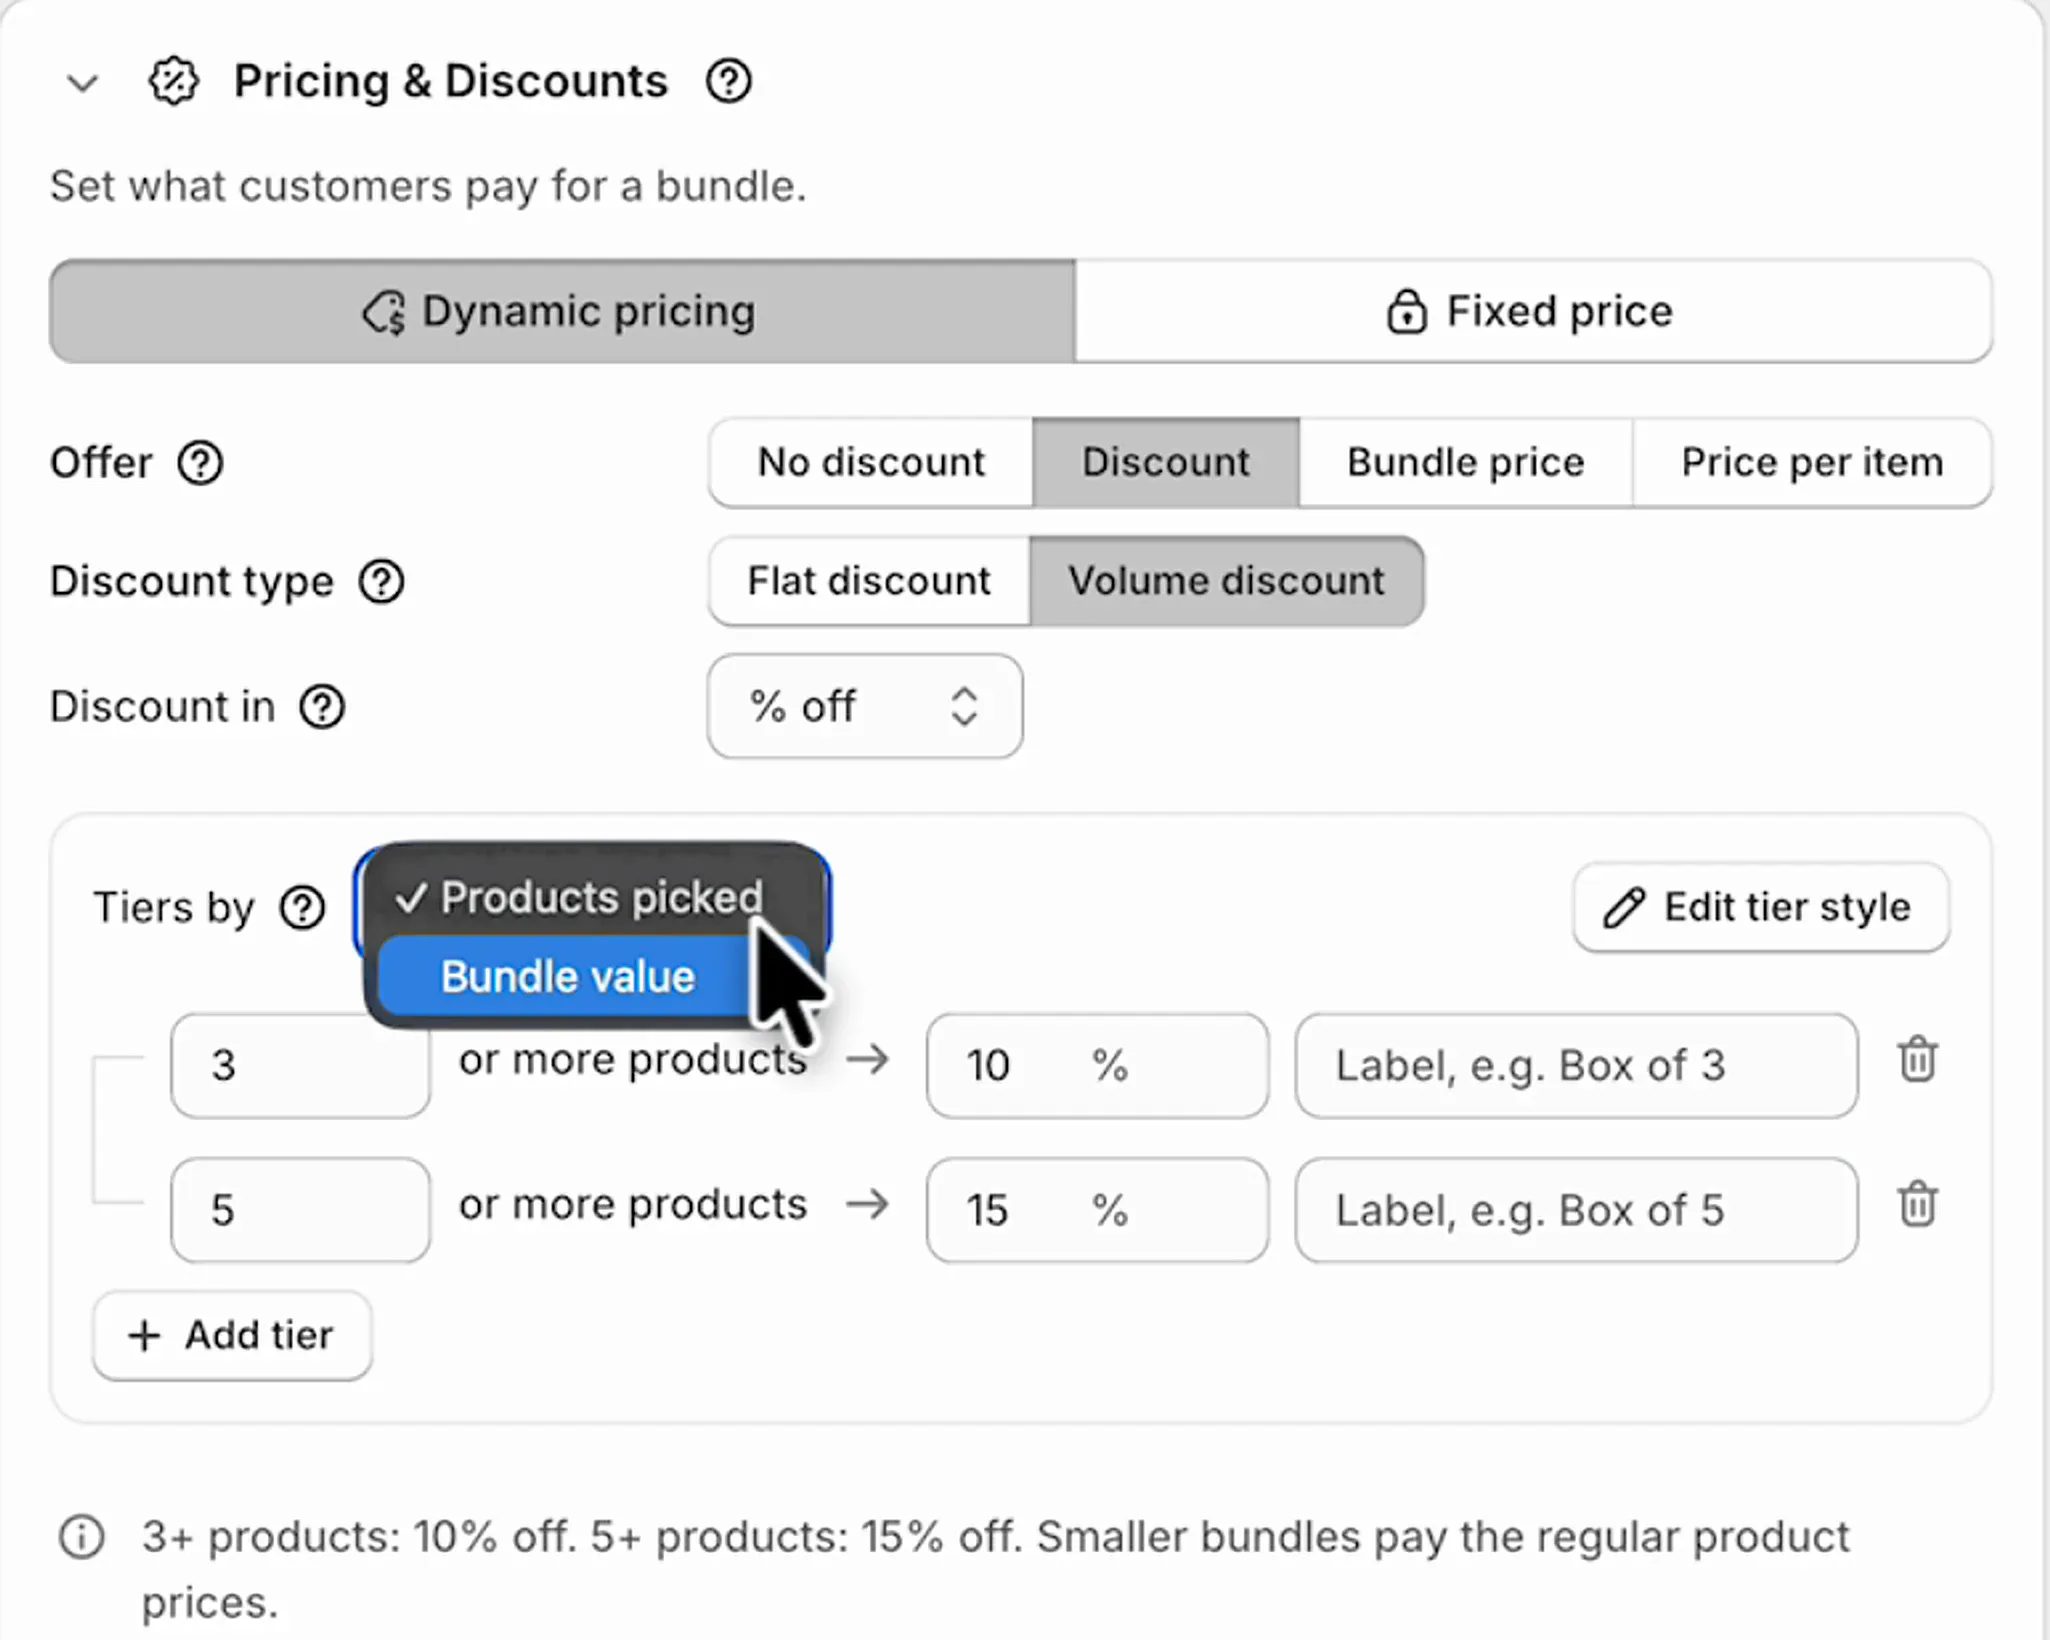
For my builder I kept it simple: a flat 10% discount on every bundle. The field under it, Discount name in cart & checkout, is the label shoppers see on the bundle line (the demo store calls it "Bundle discount"). More on tiers is on the volume and tiered discounts page.
Tip: Not sure where to put the tiers? Give ChatGPT your prices and costs and let it do the margin math. Here's a ready prompt for a cookie builder; change the numbers to yours.
4. Rules: how many picks fit in one bundle
The Rules panel sets the limits that grey out the Add buttons and keep Buy now disabled. You can limit by Product count, Bundle value, Combined (both) or Custom conditions. Mine is "Customers pick between 1 and 3 products", and the panel spells out what that means in plain words underneath.
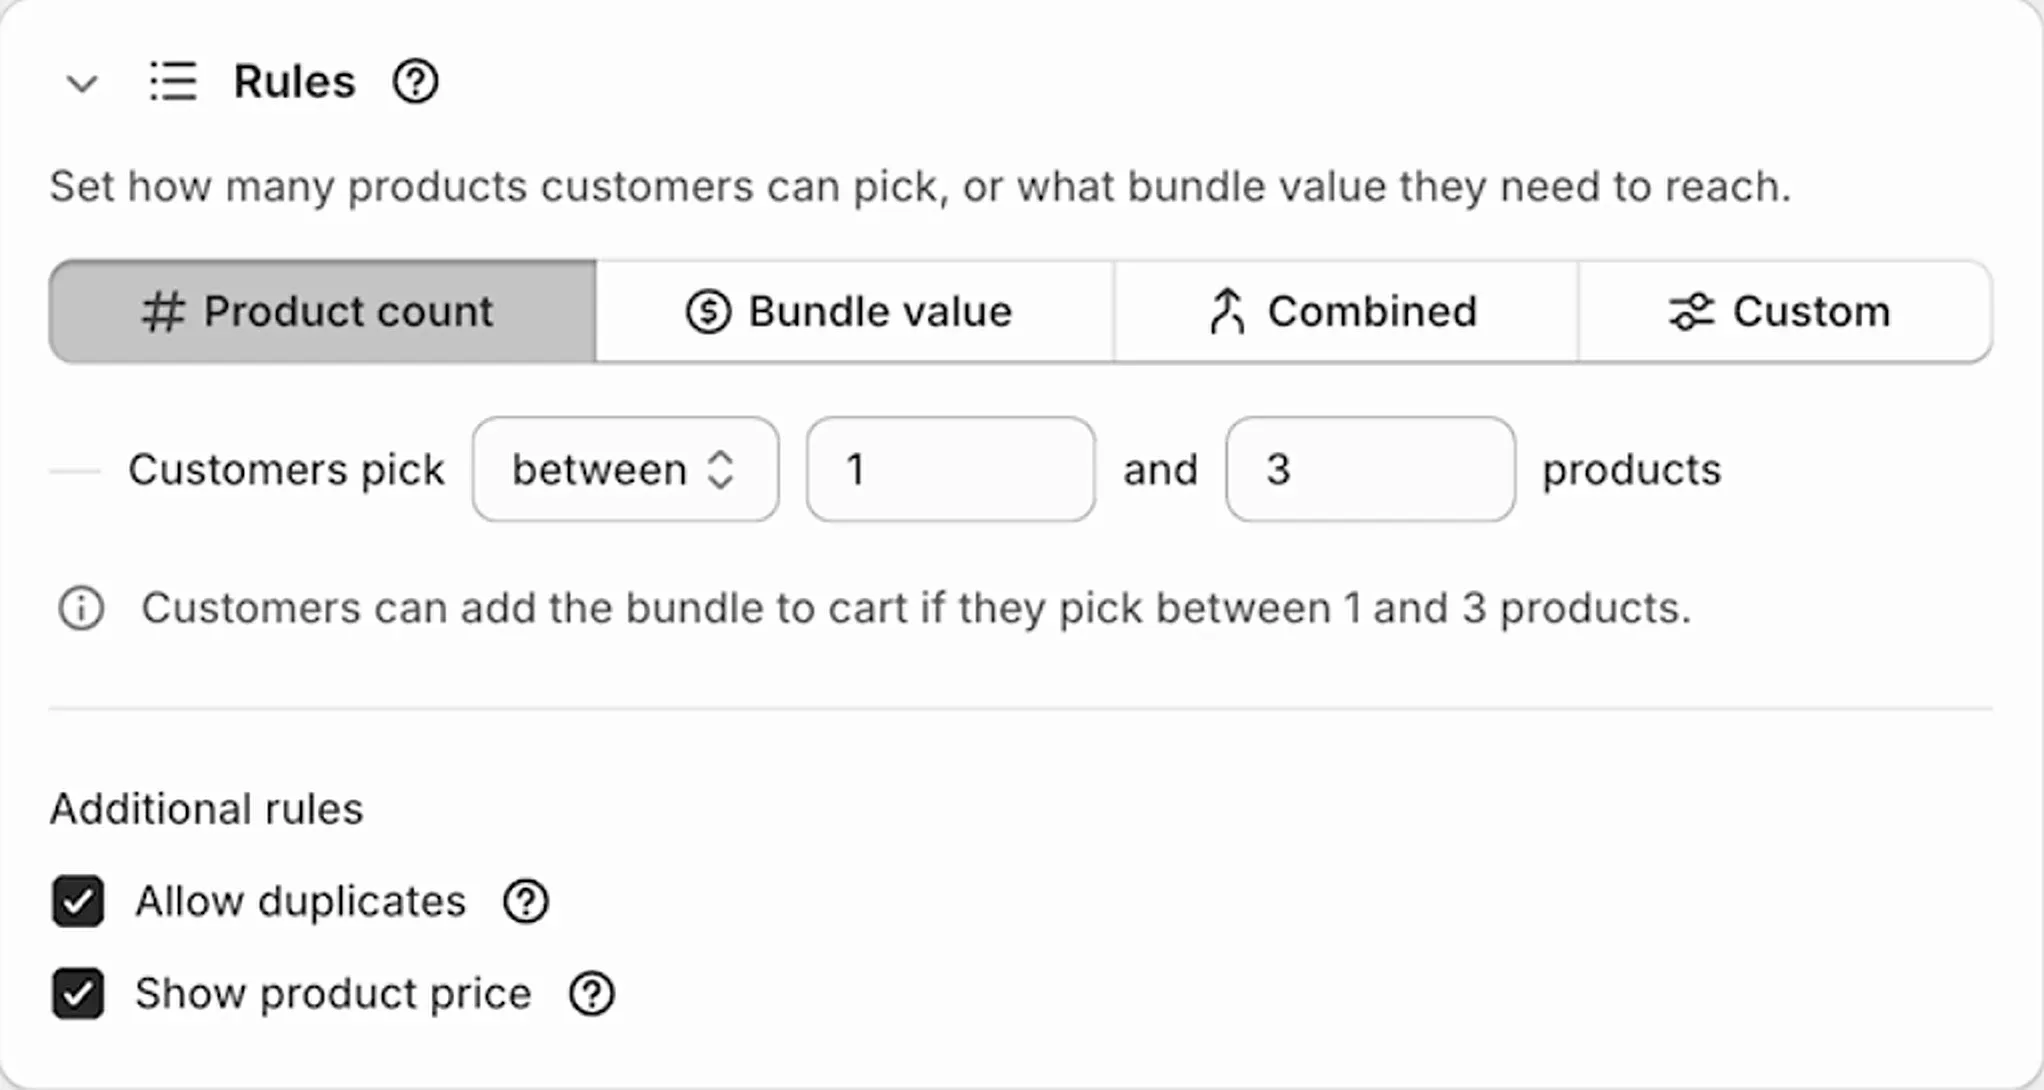
Two more switches sit under Additional rules. Allow duplicates lets a shopper pick the same cookie twice, and Show product price shows or hides prices on the cards. Save when you're done.
The same editor also has Gifts (free products with every bundle) and Upsell products (extras shoppers can add to the bundle). You don't need them for a first builder.
Heads up: Set the rules and the discount together. If your rules allow 1 to 3 products and the discount needs 3, shoppers can check out a single cookie at full price. That might be what you want, but decide it on purpose.
Getting shoppers into the builder
Switching Visibility from Draft to Active and saving puts the builder live. NeatBundles then opens a "Your bundle is live" dialog with a line I wish more apps said out loud: "Shoppers will only find it if you link to it." A builder page that nothing links to gets no visitors, however good it looks. The dialog gives you two ways in:
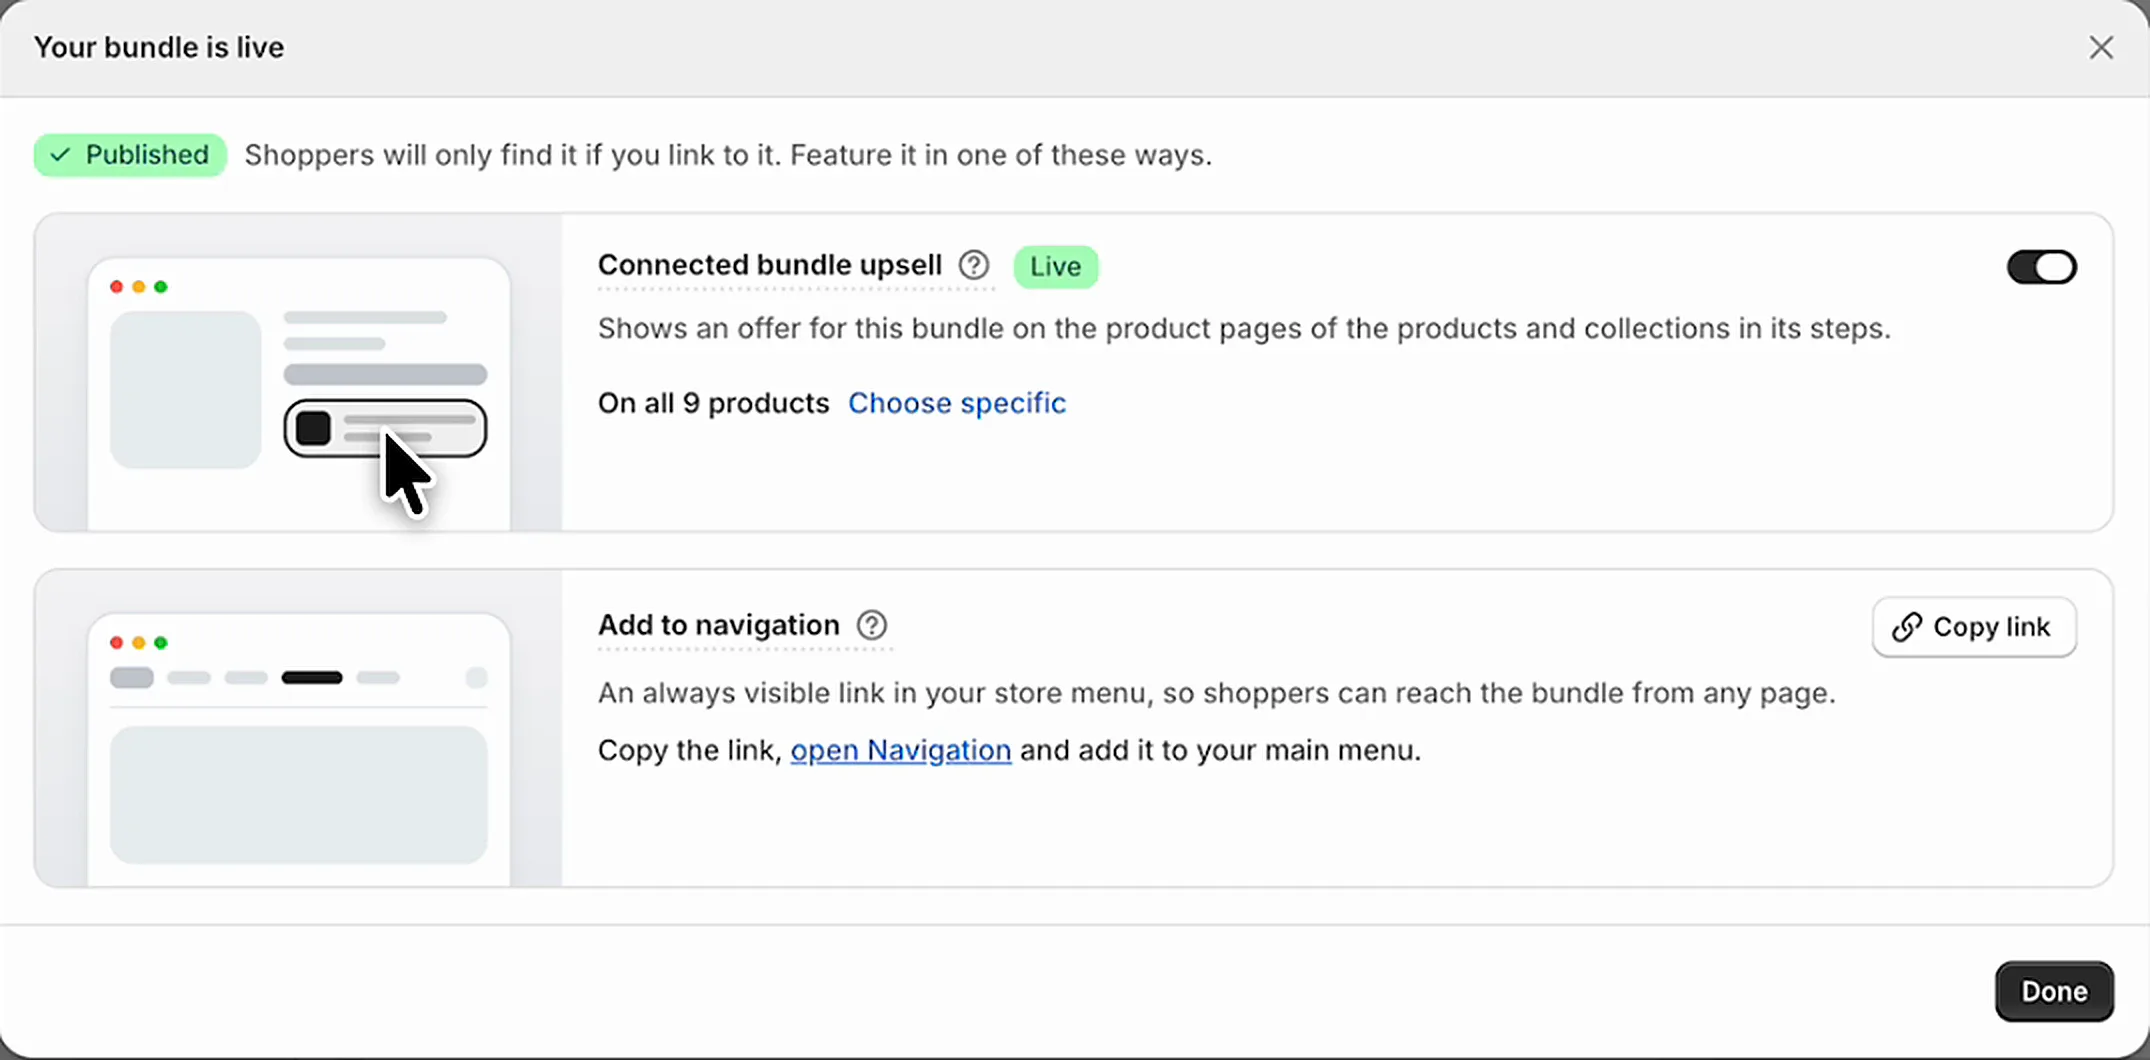
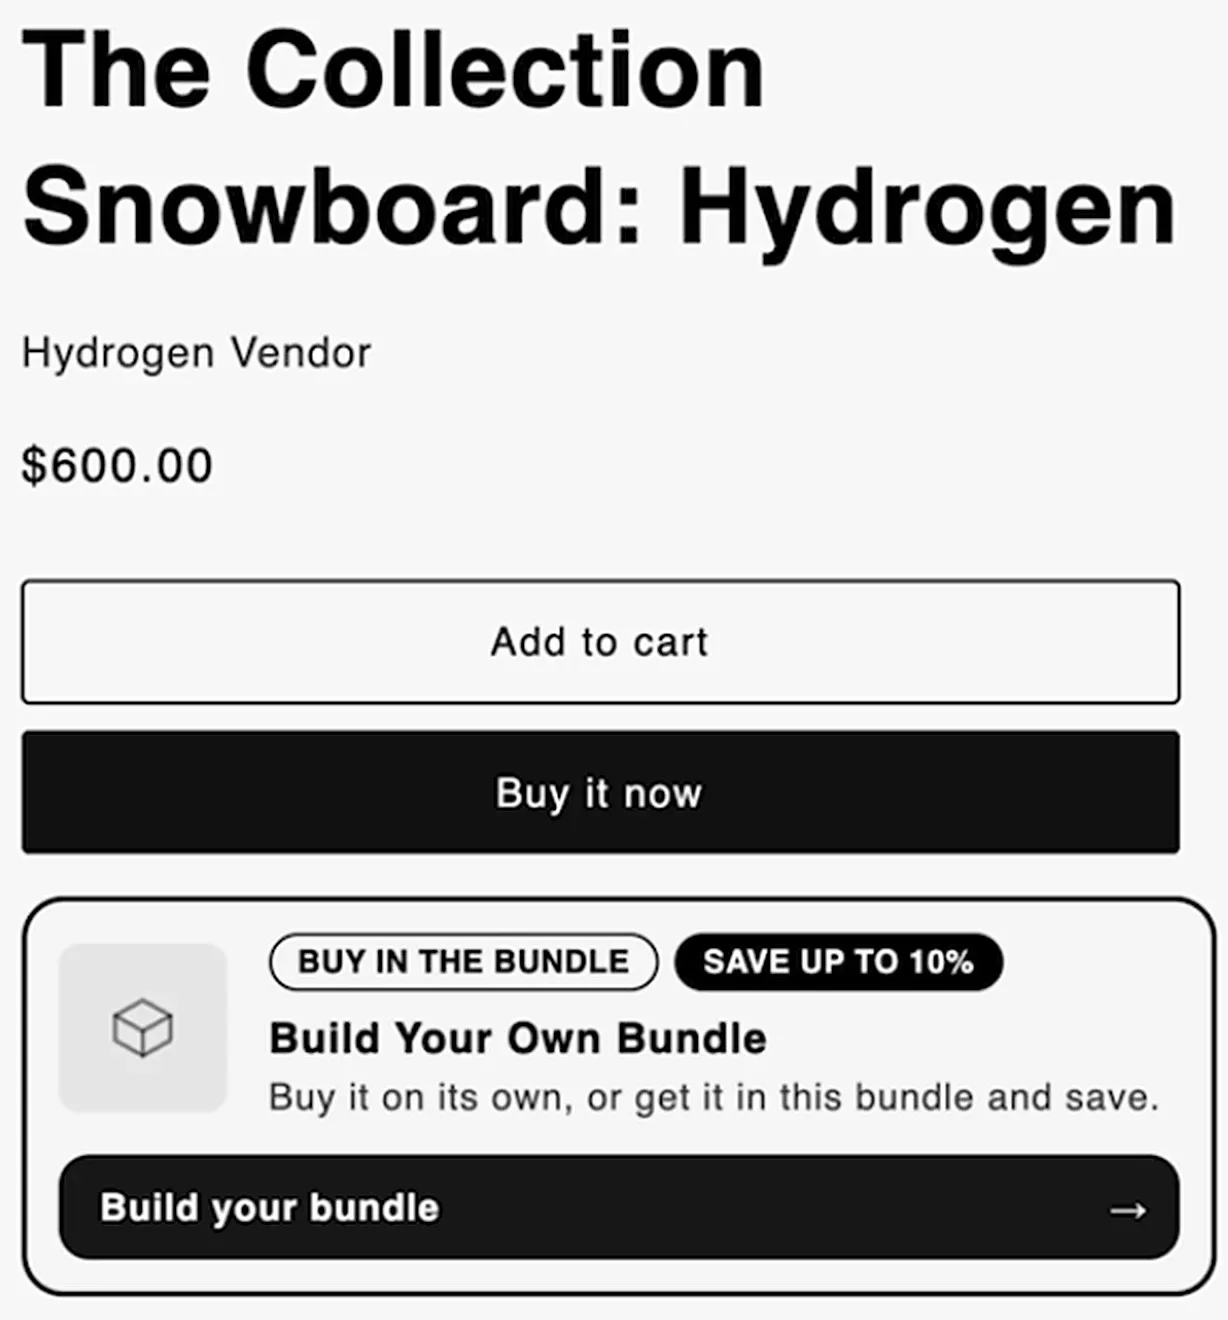
Connected bundle upsell adds a card to the product page of every product in the bundle, on all 9 products in my case, or only the ones you choose. I recommend turning it on. Someone looking at a single product sees that it's also sold in a bundle, how much they'd save, and a button that takes them into the builder:
Add to navigation is the second way in. Click Copy link, open Navigation in Shopify and add the builder to your main menu. Then it's one click away from every page, not only from the products inside it.
After that, click Done and View on storefront to try it yourself: add a few products, remove one from the grid and one from the panel, and click Buy now to check the discount reaches checkout.
Which NeatBundles layout fits your products?
A single-page mix and match builder fits interchangeable products: cookies, snacks, socks, candles, skincare minis. Shoppers grab what they like and the rules keep the box the right size. For other offers, NeatBundles has a layout that fits better:
- The bundle has a set structure. If every box needs one base, two sides and a card, a guided bundle walks shoppers through each part in order.
- You have hundreds of products. Point the builder at a focused collection, or create a few themed builders, so every grid stays easy to browse.
- Shoppers buy more of the same product. Volume and tiered discounts reward bigger quantities without a builder.
What to check in the first few weeks
Once the builder is live, check a few things before you change the offer:
- Do bundles reach checkout with the discount? Place a test order and look at the order in Shopify admin.
- Where do builder visitors come from? If almost nobody arrives from product pages, check the upsell card is on and visible on mobile.
- How big are the bundles? If most shoppers stop at the minimum, a volume tier just above it gives them a reason to add one more.
NeatBundles has its own Analytics page in the app, so you don't need extra tracking to see bundle sales.
Frequently asked questions
Can Shopify's own Bundles app make a mix and match bundle builder?
No. Shopify's free Bundles app creates fixed bundles, where you choose the products and the shopper buys that exact set. A mix and match bundle builder lets the shopper choose the products, so you need an app like NeatBundles, which still uses Shopify's native bundles underneath for orders and inventory.
Can the discount get bigger as customers add more products?
Yes. Choose Discount, then Volume discount in Pricing & Discounts, and add tiers such as 10% off at 3 or more products and 15% off at 5 or more. Tiers can also use bundle value instead of product count. The empty panel then tells shoppers how many more products reach the next tier.
Can I use a whole collection instead of picking products one by one?
Yes. In the Products panel, switch from Products to Collections and select the collection. Every product in that collection appears in the builder, and new products you add to the collection later show up without editing the bundle.
How will customers find my mix and match bundle builder?
Link to it. Turn on the connected bundle upsell so every product in the bundle shows a "Build your bundle" card on its product page, and copy the builder's link into your store's main menu. You can also share the link in emails, ads and social posts like any other page.
Does a bundle builder keep inventory accurate?
Yes, with NeatBundles. Each bundle is split into the individual products the shopper picked, using Shopify's native bundles, so each item's stock goes down on its own. Sold-out variants can't be picked, so shoppers can't build a bundle you can't ship.
How much does a mix and match bundle builder cost?
NeatBundles is free to use up to $500 of bundle sales a month, which is enough to launch a builder and see how it sells. Above that, the plan follows your bundle sales; see pricing for details.
Build yours next
A good bundle builder comes down to a grid of products, a panel that shows the saving, rules that keep the bundle the right size, and a few links that bring shoppers in. Start with one collection, one flat discount and the product page upsell turned on, then add volume tiers once you see how big bundles get.
Install NeatBundles from the Shopify App Store and have a look at what else the mix and match bundles feature can do.