A Shopify bundle landing page is a standalone page where shoppers pick products for their own bundle from a grid, watch a live summary with the discount, and check out in one click. You can build one without code in NeatBundles: add a bundle, choose the single-page layout, set a discount, select products and switch it to Active.
The video above shows the whole build in NeatBundles, from an empty bundle list to a live page. This guide follows the same steps, then covers what to put on the page and where to link it from, so shoppers can find it.
Key takeaways
- A bundle landing page gives the whole screen to building the bundle, instead of squeezing a builder into a product page.
- The essentials: one clear instruction, a product grid, a summary panel that shows the discount as it grows, and one button to checkout.
- In NeatBundles the page is the Build Your Own Bundle layout: name it, select products, set the discount, set it to Active.
- The page has its own link, so you can put it in ads, social posts, emails and your store menu. NeatBundles is free to use up to $500 of bundle sales a month.
Why a bundle sells better on its own page
A bundle where shoppers choose several items needs room: six cookies, three sizes, a minimum of three items, a discount that changes with the count. A landing page gives the whole screen to that choice. A widget under the buy button on a product page fits a fixed "buy these two together" offer, but a pick-your-own bundle there shares a narrow column with a product photo that isn't the bundle.
The numbers back this up. The Pin Theory, a UK accessories brand, moved from a product-page bundle app to a full-page builder in NeatBundles. Their old bundle "was squeezed into a standard product page" and shoppers had to work out how it fit together. On the full page their average order value rose 17% and the bundle page converts at 4.5%. The details are in The Pin Theory case study.
Here's the landing page from our demo store, exactly as a visitor sees it on arrival:
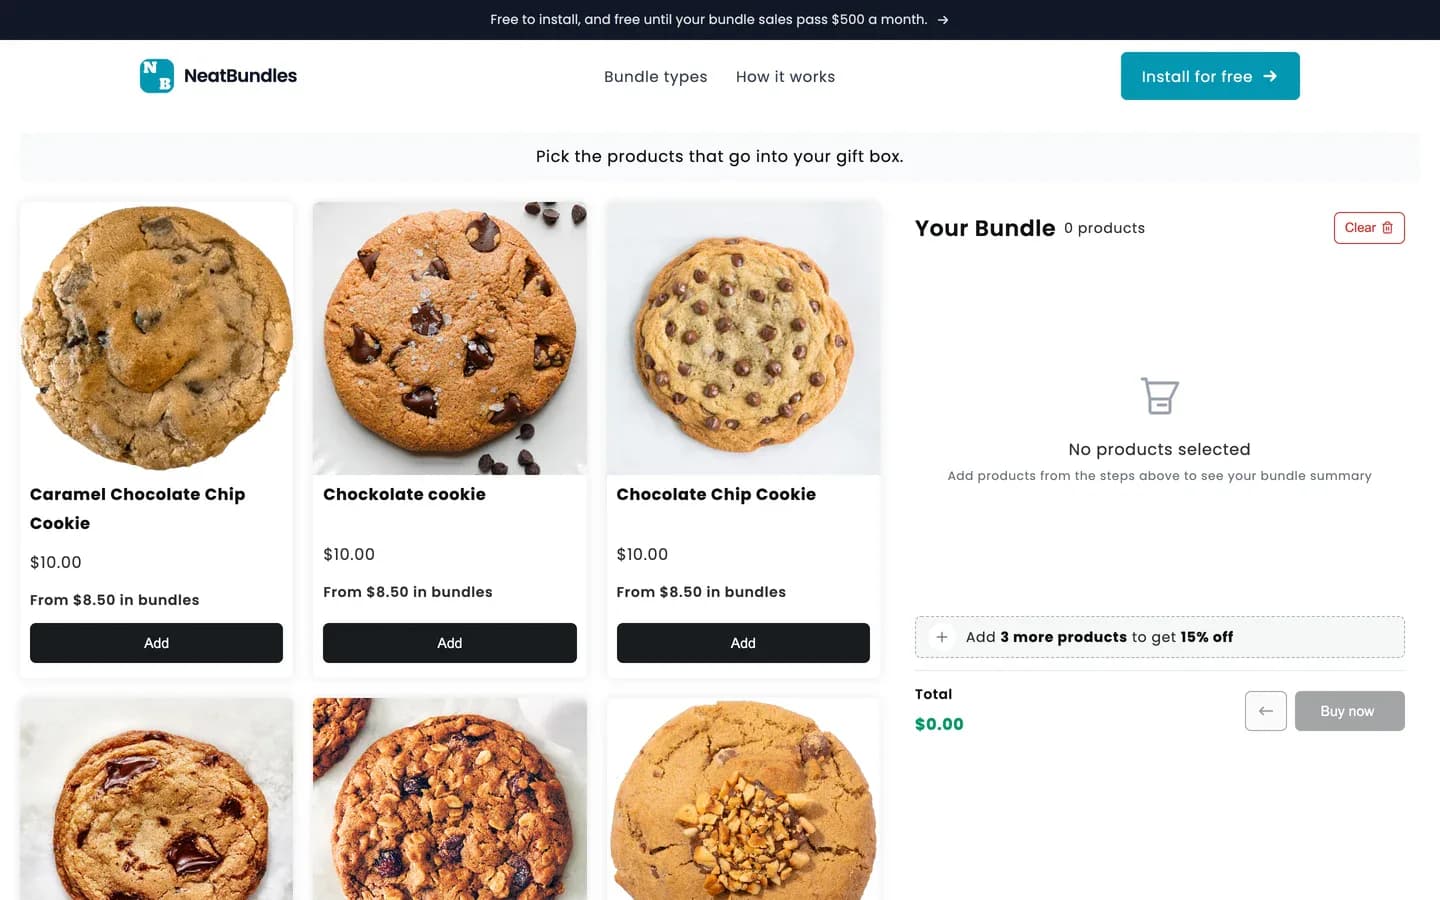
There's nothing else competing for attention: one line telling the shopper what to do, the products, and the bundle panel on the right.
What belongs on a bundle landing page
A bundle landing page is a page whose only job is to let a shopper build one bundle and buy it. Everything on it should serve that job. These are the parts that matter:
- One instruction at the top. "Pick the products that go into your gift box." Shoppers who arrive from an ad have no context, so tell them what to do in one sentence.
- A grid of eligible products only. Each card shows the regular price and the bundle price ("From $8.50 in bundles"), so the deal is visible before the first click.
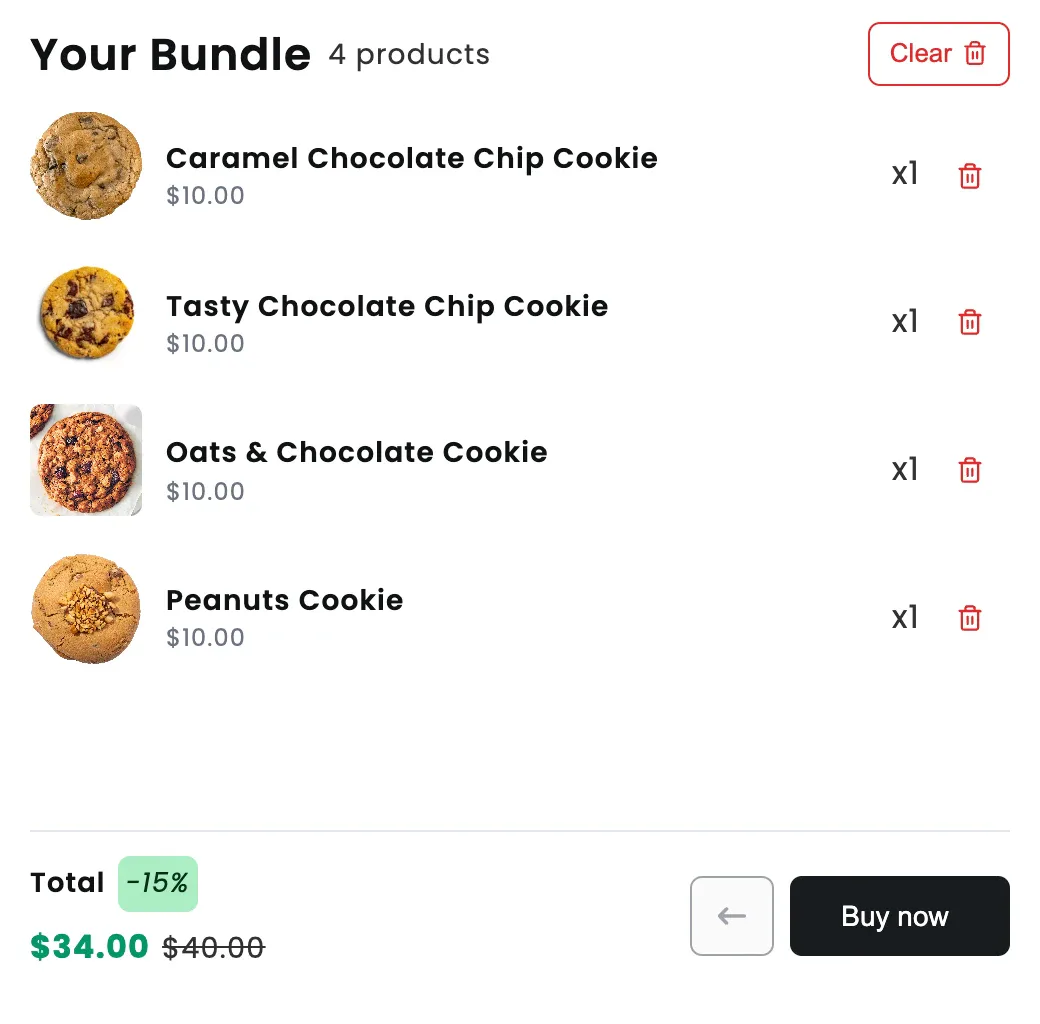
- A live summary panel. It lists the picks, shows how many more are needed ("Add 3 more products to get 15% off") and the total with the discount next to the crossed-out price.
- The rules, stated plainly. If the box takes 3 to 5 items, the page should say so before the shopper hits a wall.
- One button. "Buy now" goes straight to checkout. No upsell detours, no second offer.
This is the summary panel after four cookies, with the 15% discount applied:
Product page widget vs bundle landing page
| Bundle widget on a product page | Bundle landing page | |
|---|---|---|
| Space for choices | A narrow column under the buy button | The full page: grid plus summary panel |
| What the shopper sees first | A single product's photo and price | The products they can pick and the bundle deal |
| Best for | Fixed pairs, "frequently bought together" | Pick-your-own boxes, 3 to 12 item bundles |
| Linking from ads and posts | Lands on a product that isn't the offer | Lands on the offer itself |
| Discount visibility | Often shown only in the cart | Shown on every card and in the live total |
Building the landing page in NeatBundles
The landing page in NeatBundles is a bundle that uses the single-page layout, so you build it like any other bundle. I'll group the clicks from the video into four steps. If you haven't installed the app yet, install NeatBundles from the Shopify App Store; after a short onboarding you land on the bundle list.
1. Add a bundle and pick the single-page layout
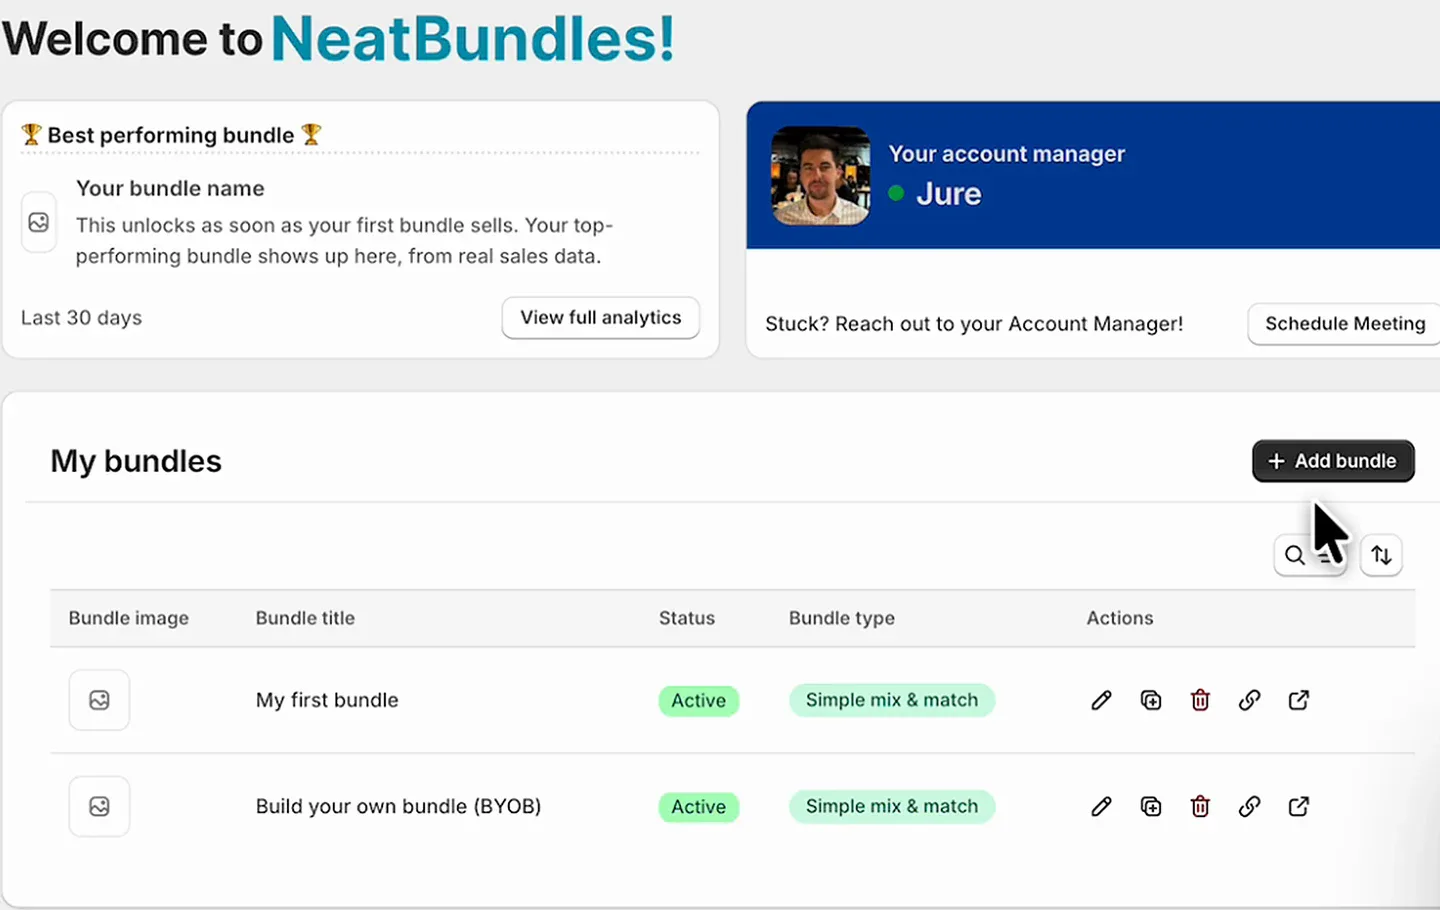
The bundle list is where every bundle lives. Click Add bundle in the top right of "My bundles".
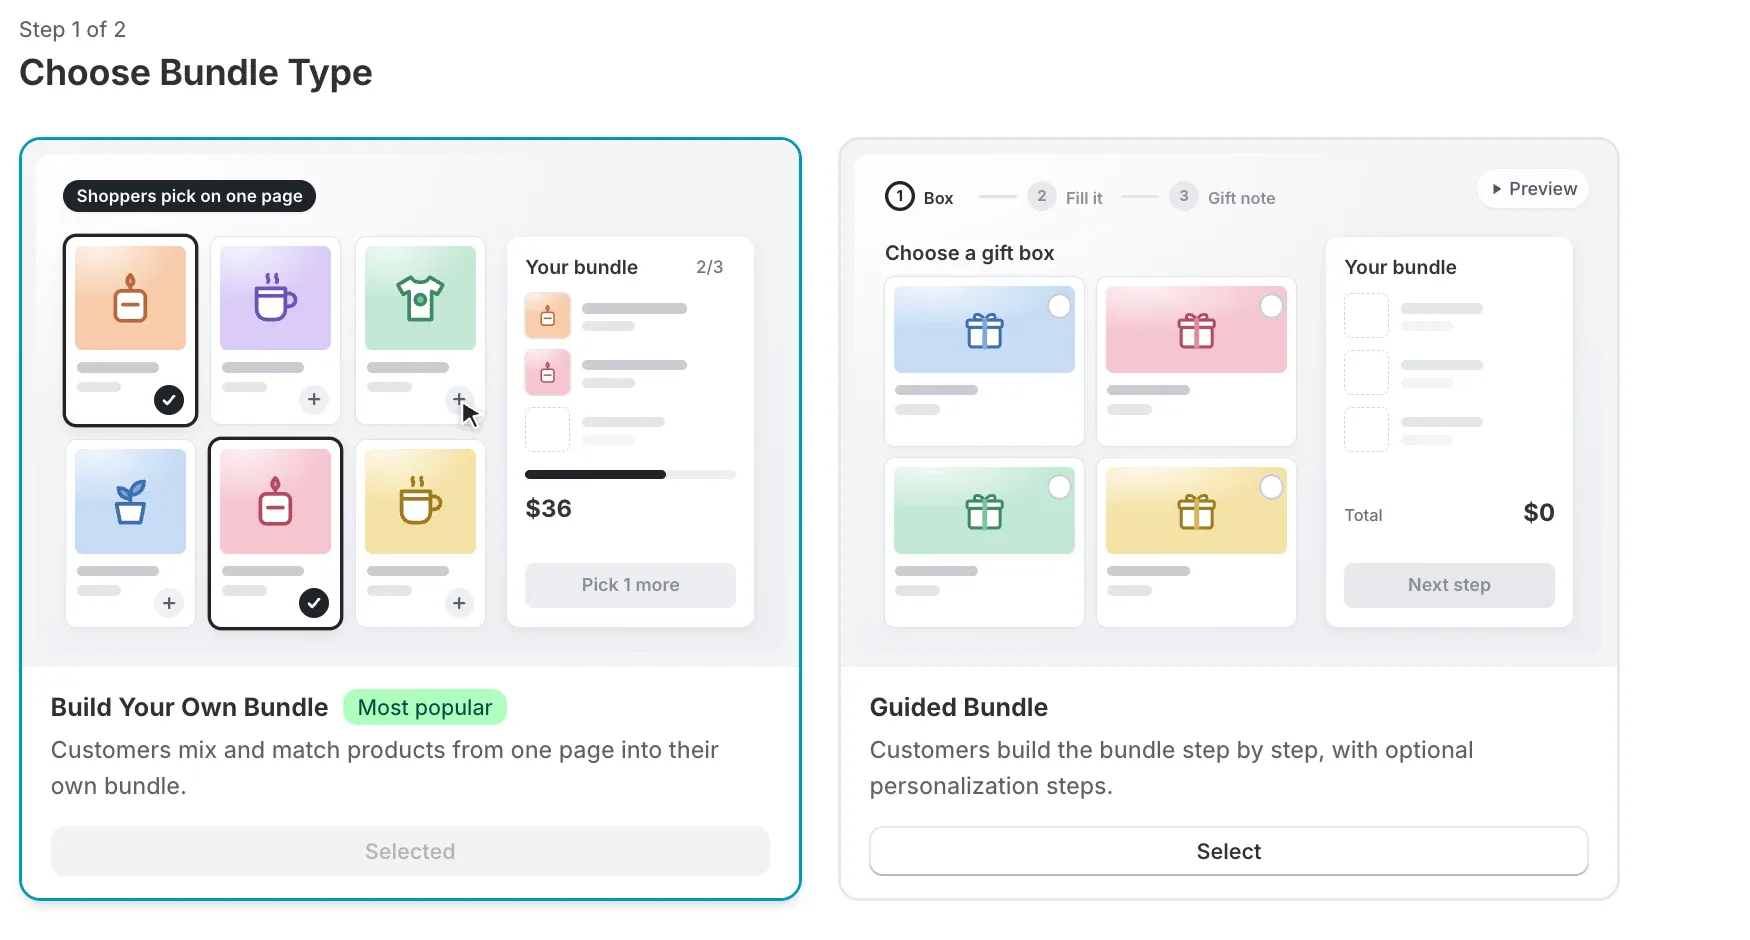
The first screen asks for the bundle type, which is really a choice of layout. Build Your Own Bundle is a single page: shoppers mix and match products into their bundle and they're done. Guided Bundle builds the bundle step by step, with optional personalization steps. For a landing page that people reach from an ad, the single page is usually the better start, because there's nothing to explain. Click Select on Build Your Own Bundle, the card marked Most popular.
2. Name it, then set the discount in the editor
The bundle name becomes the product title and shows in the cart and at checkout, so name the offer, not the page. In the video I typed "Landing page BYOB" as a placeholder; on a real store use something like "Cookie Box" or "Build Your Own Snowboard Kit". If you're stuck, ask ChatGPT for name ideas with that prompt already filled in.
Click Finish and the bundle is created as a draft.
The creation flow no longer asks for a discount. We moved it into the bundle editor, because the Pricing & Discounts panel there has more options than a quick pick could show: a percentage, a fixed amount or no discount, and a bundle price calculated from the picks or set as a fixed price. Set it once the bundle opens; I went with 15% off.
3. Choose the products and the rules
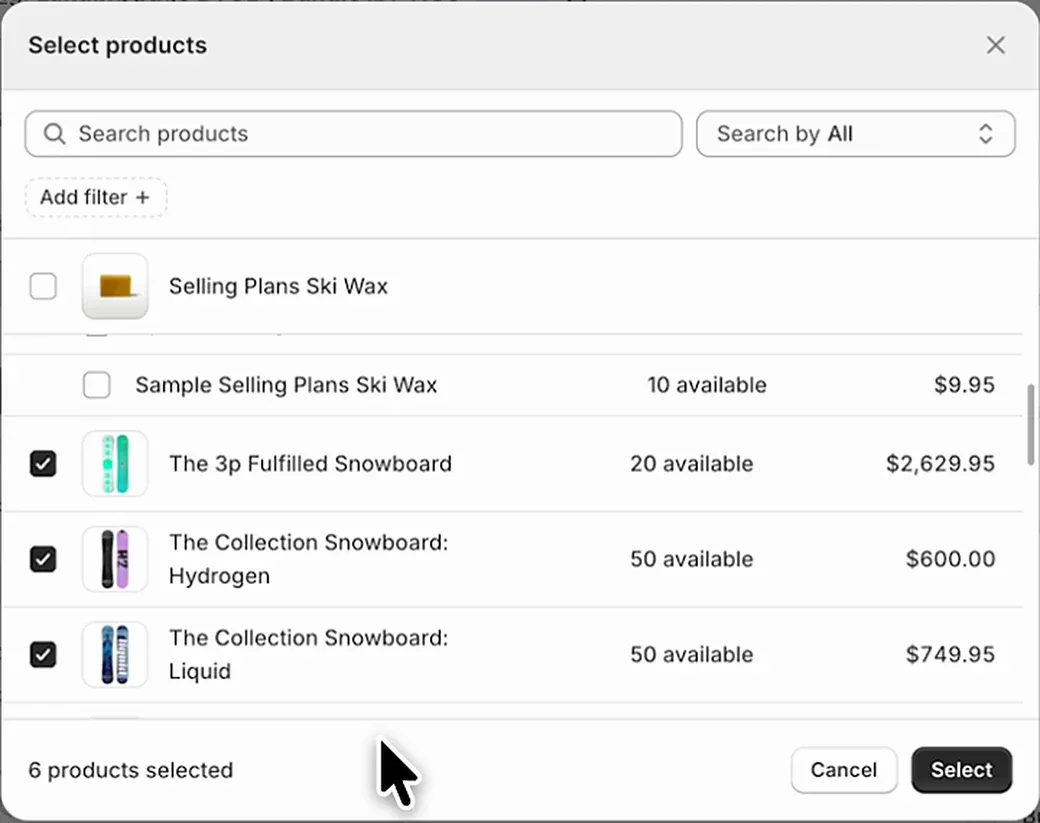
The bundle editor has many options, but the Products section is the one that makes the page. Click Select products, tick the products shoppers can choose from, click Select, then Save. I picked six snowboards from the recording store. Pick fewer rather than more: a page with six to twelve products is easier to build from than one with forty.
Scroll down and you'll find Discounts and Rules. Switching from Simple discount to Volume discount lets you add tiers, so a bigger bundle earns a bigger discount; the volume and tiered discounts page explains the options. Under Rules you set the minimum and maximum number of products. Set these to match the instruction at the top of your page.
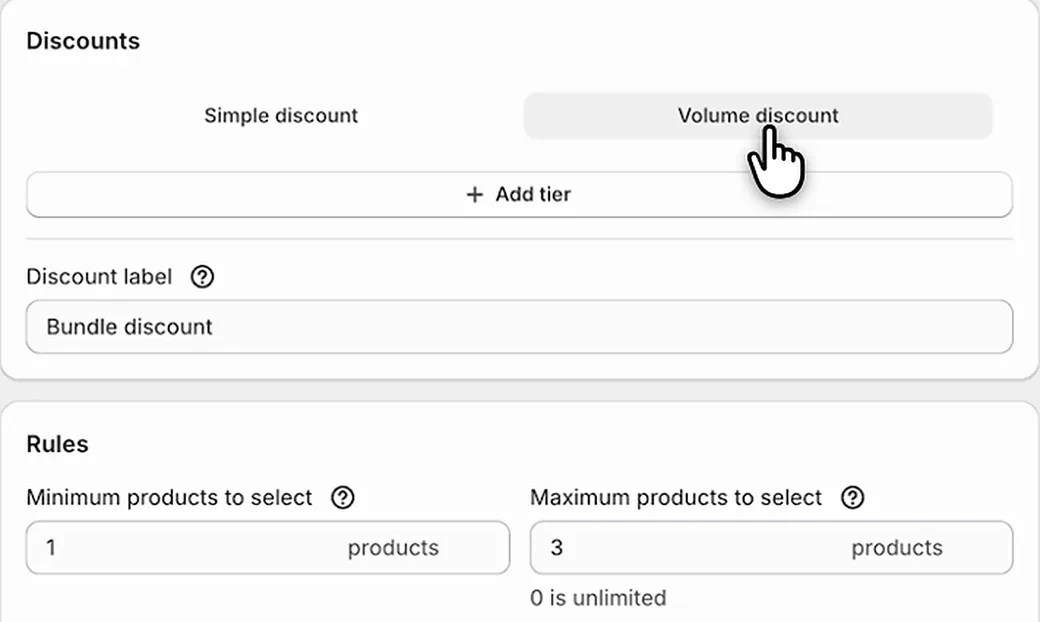
Tip: If the page promises a box of 3 to 5, set minimum 3 and maximum 5. A mismatch between the headline and the rules is the fastest way to lose a shopper halfway through.
4. Switch it to Active and open the page
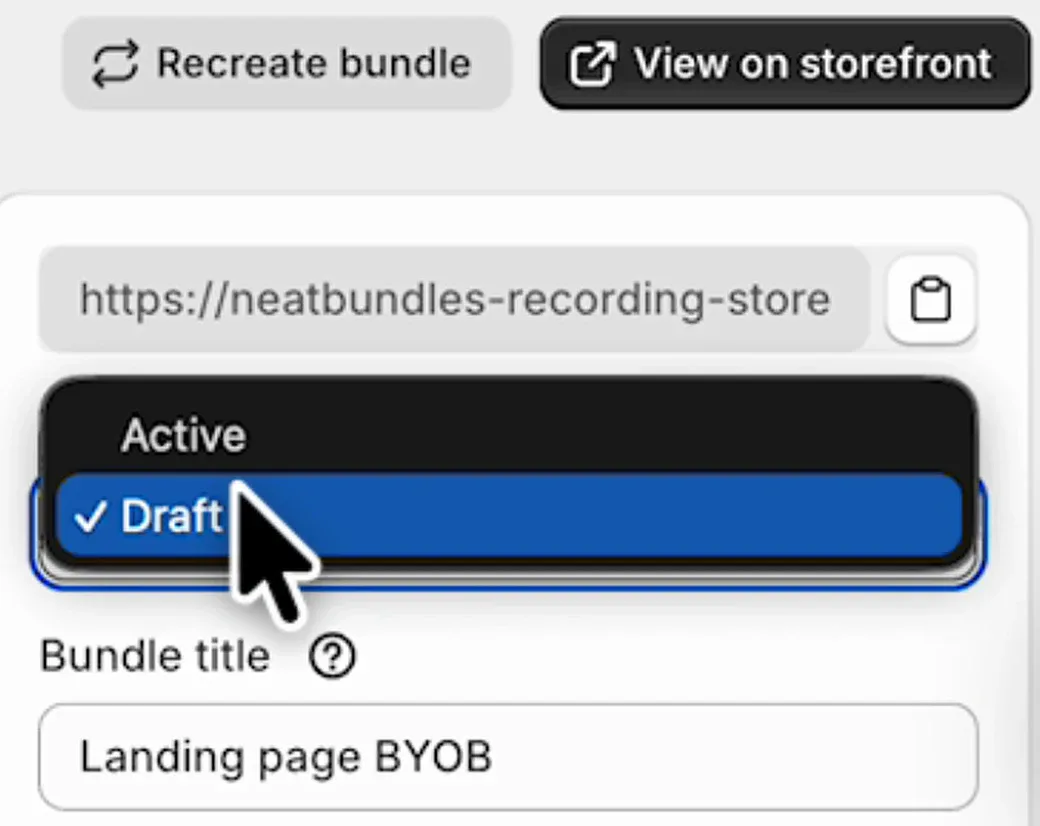
New bundles start as Draft, and a draft is invisible to shoppers. In the right column, open Visibility, choose Active and click Save. The same column holds the page URL with a copy button; that's the link you'll share later.
Once it saves, the badge turns green and View on storefront opens your new landing page.
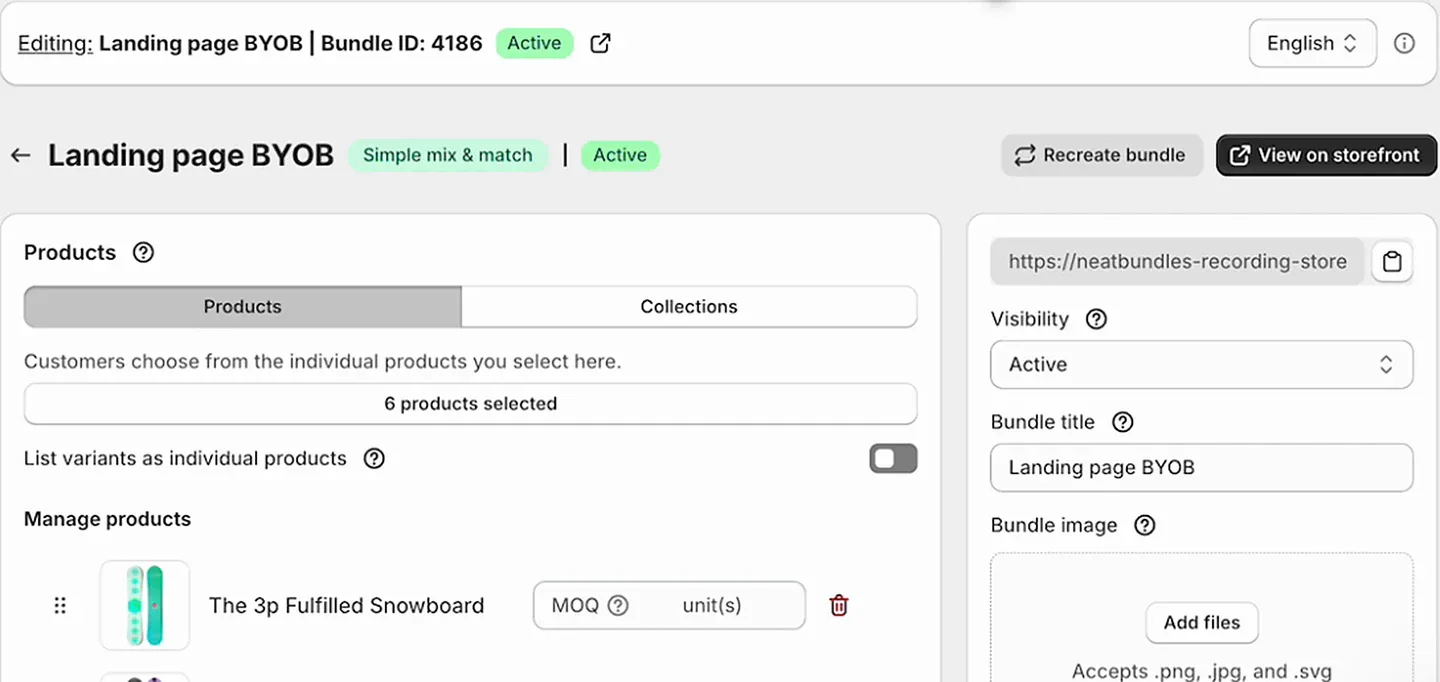
Heads up: Forgetting the Draft to Active switch is the most common reason a new bundle page "doesn't work". If the link shows nothing, check Visibility first.
Check it the way a shopper will
Before you spend a cent on traffic, build a bundle on the live page yourself, on a laptop and on your phone. The page in the video is the same layout as the cookie page above, just with snowboards.
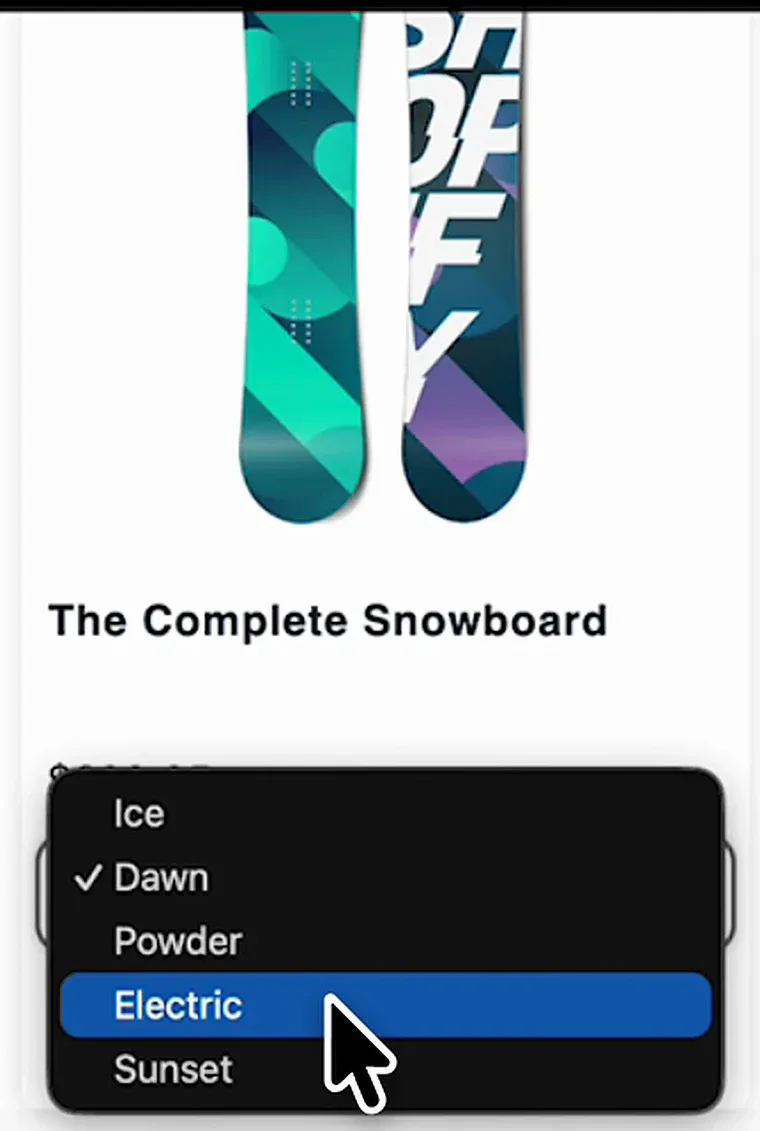
Products with variants get a picker right on the card. In the video I picked the Electric design of The Complete Snowboard without leaving the page, while the panel kept the 15% discount on the running total.
Clicking Buy now goes straight to Shopify checkout. The bundle arrives as one line named after the bundle, with the bundle discount on it and every item listed underneath. Four cookies at $10 came to $34.00, a $6.00 saving:
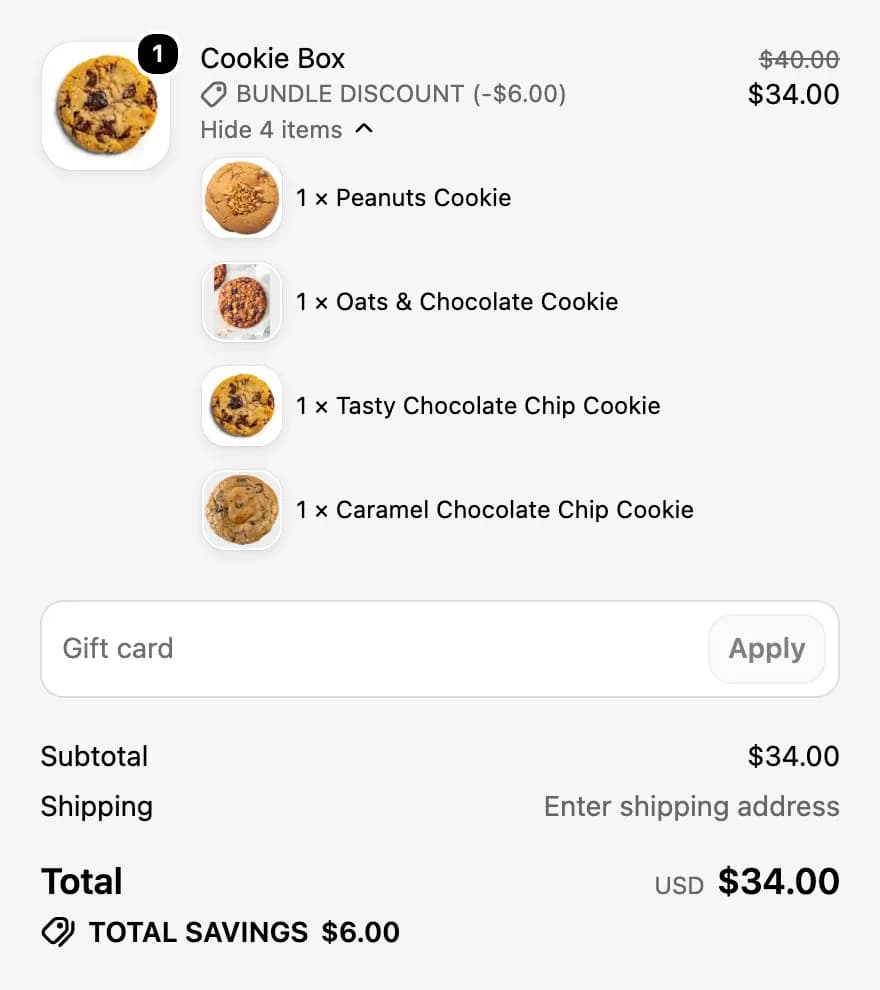
Each item stays its own product in the order, so Shopify tracks inventory per item and you see exactly what to pack. Sold-out variants can't be picked in the first place.
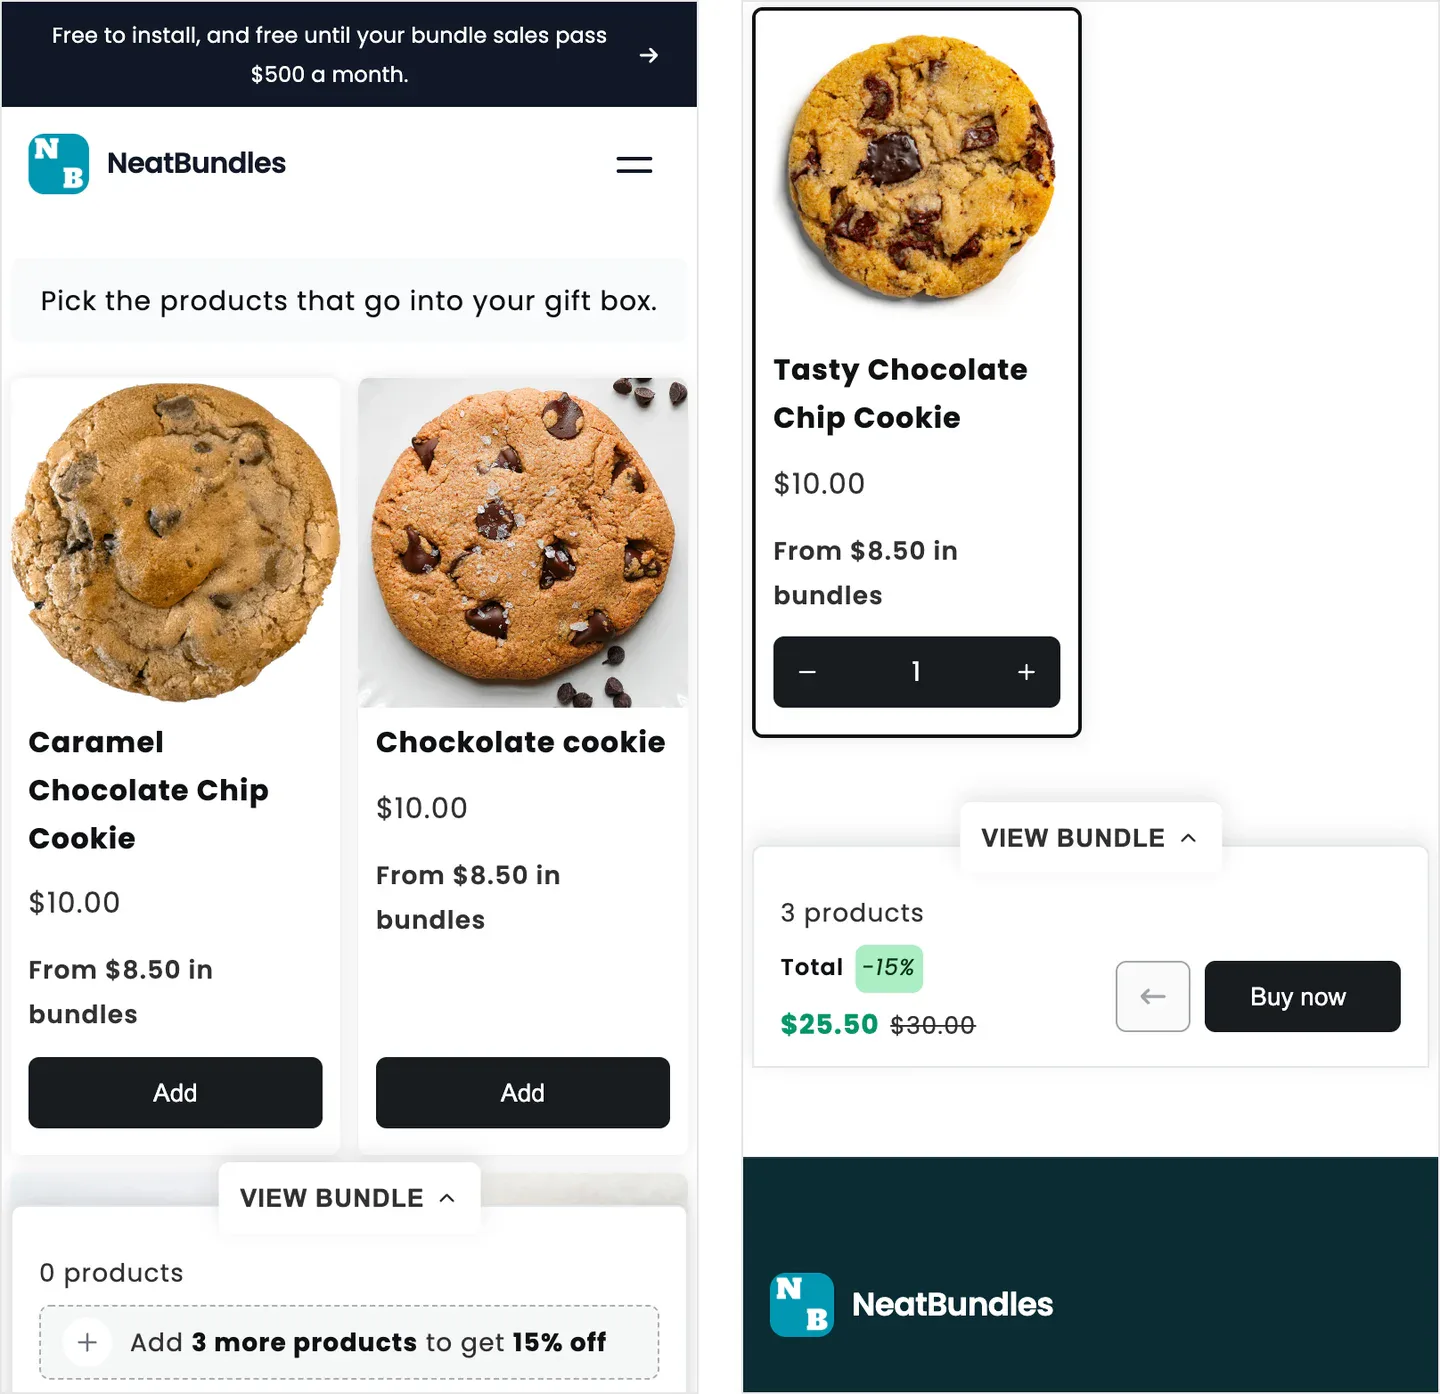
Then check the phone. Plenty of visitors from social posts and ads arrive on one, and the layout changes there: the grid goes to two columns and the summary becomes a sticky View bundle bar at the bottom with the count, total and Buy now button.
Where to send people once the page is live
A landing page only works if people land on it. Because each NeatBundles bundle is a regular Shopify product, the page has an ordinary store link (/products/your-bundle-name) that you can use anywhere:
- Paid ads. Point Google Ads and Facebook or Instagram ads at the bundle page, not at your homepage. The ad promises "build your own box, 15% off", and the page delivers exactly that on the first screen.
- Social posts and bio links. A short video of someone building the box, with the link in the caption or bio.
- Email. One bundle per send works better than a list of offers. Gift seasons are a natural fit.
- Your store menu. Add the page to the main navigation like any product, so returning customers can find it.
- Related product pages. A short line on each cookie's page ("Want a mix? Build a box of 3 to 5 and save 15%") sends people who are already interested.
Tip: Add UTM tags to every link you share, for example with Google's Campaign URL Builder, so you can see which channel actually sells bundles.
Landing page, product page or steps?
A landing page fits best when shoppers choose several items from a range and you want to send traffic straight to that choice. For other offers, match the layout to the bundle: a fixed pair that's always bought together sits well on the product page, and a bundle with an order to it (a base, then add-ons, then a gift note) suits the Guided Bundle layout from step 1, which walks shoppers through each part.
For a broader look at the same single-page layout, see how to build a build your own bundle page and our mix and match bundle walkthrough.
Frequently asked questions
What is a Shopify bundle landing page?
A Shopify bundle landing page is a standalone page built around one bundle offer. Shoppers see the eligible products in a grid, add the ones they want, watch the price and discount update in a summary panel, and go to checkout with the whole bundle in one click. It replaces a cramped bundle widget on a product page.
Can I make a bundle landing page with Shopify's free Bundles app?
Not a pick-your-own one. Shopify's free Bundles app creates fixed bundles, where you decide the contents in advance, and it does not support mix and match. For a page where shoppers choose their own items you need a bundle app such as NeatBundles, which adds the builder through a theme app extension without code.
Does a bundle landing page work on mobile?
Yes. In NeatBundles the product grid drops to two columns on a phone, and the summary moves into a sticky "View bundle" bar at the bottom of the screen, showing the number of products, the discounted total and the Buy now button. Test your own page on a phone before running ads to it.
Can I add the bundle landing page to my store menu?
Yes. Each NeatBundles bundle is a regular Shopify product, so its page has a normal product link. You can add it to your main menu, link it from other product pages, collections or blog posts, and use the same link in emails, social posts and ads.
How much does it cost to run a bundle landing page with NeatBundles?
NeatBundles is free to use up to $500 of bundle sales a month, with no card needed to start. Above that, pricing grows with your bundle sales and every feature is included on every plan. See the pricing page for the current plans.
Launch it this week
Pick one bundle you already sell or could sell, build the page in the four steps above, test it on your phone, and send one channel to it: an email, an ad set or a pinned post. Watch which channel sells bundles, then add the next. To see what else the single-page layout can do, look at the mix and match bundles feature page, or install NeatBundles for free and build your first bundle landing page today.